-
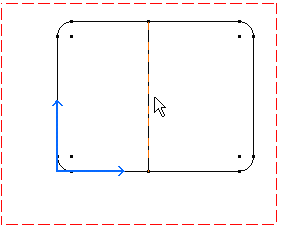
Select an element, a line for example.
-
Click Translate
 in the Geometry Modification toolbar (Transformations
sub-toolbar).
in the Geometry Modification toolbar (Transformations
sub-toolbar).The Translation Definition dialog box appears and the Start Point value fields (H and V) appear in the Tools Palette.

-
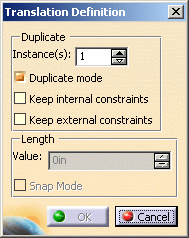
The Duplicate mode option (Translation Definition dialog box) is activated, by default. If not, activate this mode.
-
Type the duplicated line Start Point coordinates in the Tools Palette: for example, 1.7in in the H field, and 0in in the V field.
-
Press the Enter key.
-
You can either:
-
Type the duplicated line End Point coordinates in the Tools Palette: for example, 2in in the H field, and 0in in the V field.
-
Press the Enter key. A second line is created and translated according to the existing one.
Or
-
Enter a length for the line in the Value field in the Translation Definition dialog box. For example, 0.3in. The Snap Mode is automatically deactivated.
")
-
Click OK to validate.
-
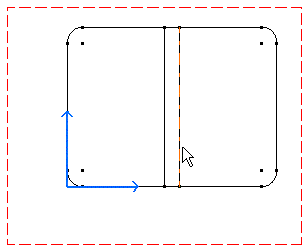
Once you are satisfied with your operation, you can end the translation by clicking in the drawing at the location where you want the line to be located. A second line is created and translated according to the existing one.
-
-
Proceed in the same manner to create the third, fourth, fifth and sixth lines. The process described above is valid for any other line to be created with the Translation command in our context.
")
Select two lines at a time to perform your translation, it is time-saving. Your final drawing will look like this:
")
![]()