 |
This first task shows you how to enter the
Drafting workbench and start a new drawing. |
 |
1. Select File >
New (or click New
 ). ). |
|
The New dialog box is displayed, allowing you to choose the type of the
document you need.
2. Select Drawing in the
List of Types field and click OK.
|
|
OR
1. Select Start > Mechanical
Design from the menu bar.
2. Select the Drafting
workbench.
|
|
OR
1. Select Tools > Customize
(Start Menu tab) and define the Favorites (Drafting)
and Accelerator (F12) options as shown below and click
Close.
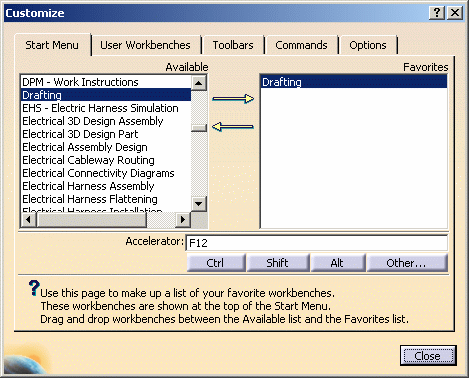
2. Press the F12 key or
select Start > Drafting from the menu bar.
 |
|
Whichever method you used for entering the Drafting workbench you used,
the New Drawing dialog box is displayed, allowing you choosing the type of
Standard, Sheet Style, Orientation you need. The sheet style defines among
other things the sheet format, scale and orientation.
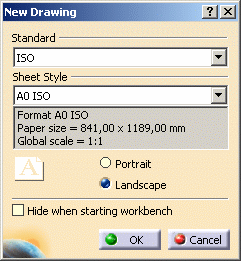
3. Select the ISO
standard and click the Landscape option. |
| |
If you activate the Hide when starting workbench option, the
next time you enter the Drafting workbench via Start > Drafting
or by pressing the F12 key, the New Drawing dialog box will not
appear any more and the last selected standard, sheet style and orientation
will be used by default to create the drawing. You will always be able to
reactivate this dialog box by unselecting the Hide when starting
workbench option available via Tools > Options > Mechanical
Design > Drafting > General tab, or to access it by selecting
File > New Drawing from the menu bar.
4. Click OK. |
 |
- You can add an unlimited number of customized standards using
Standard files that you will create and/or, if needed, modify. Once
created, this standard will appear in the New Drawing dialog box. For
more details on standards, see the
Standards
Administration section. Note that any user-defined standard is based
on one of the four international standards (ANSI, ISO,ASME or JIS) as far
as basic parameters are concerned.
- You can add an unlimited number of customized sheet styles using
Standard files, see
Sheet
Styles.
|
| |
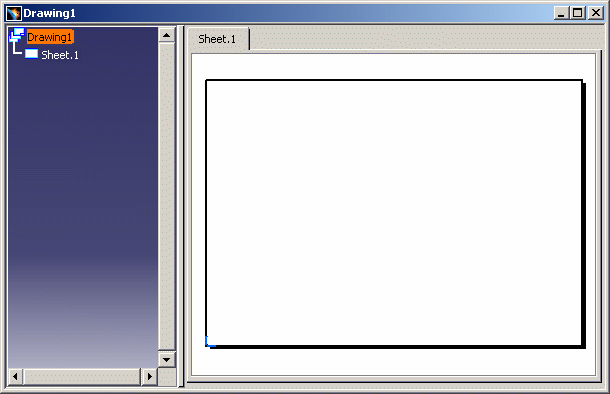
The Drafting workbench is loaded and an empty drawing
sheet opens. The drawing specification tree is displayed to the left of the
sheet. |
|
 |
 |
Pressing the F3 key lets you show or hide the
specification tree as desired. |
 |
Make sure you customized the units
accordingly. For this:
-
Select the Tools > Options command to
display the Options dialog box.
-
Click General > Parameters and Measure in the
list of objects to the left of the Options dialog box.
-
Select the Units tab and set Length
to Inch and then click OK.
|
 |
To visualize better your drawing, tile the
windows horizontally from the menu bar. |
|
The commands for creating and editing features
are available in the workbench toolbar. Now to fully discover the
Interactive Drafting workbench, let's perform the following tasks. |
|

|


![]()