![]()
|
|
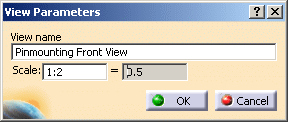
This task will show you how to create an advanced front view. Creating
advanced front views lets you configure such elements as the view name,
view scale, etc. Whenever possible, a pertinent projection plane is
automatically offered. For more information on front views in general, refer to Creating Front Views. |
||
|
|
Open the Pinmounting.CATPart document. Define a new drawing sheet. | ||
|
|
|
||
|
|
The DMU Space Analysis workbench lets you create section boxes in 3D. When generating advanced views from the DMU Space Analysis workbench, you can select this section box to generate a view displaying only the box content. If you then modify the section box in 3D, the view will be shown as needing an update in the drawing. If you destroy the section box in 3D, the box definition will remain in the drawing. For more information on section boxes, refer to Creating Section Boxes in the DMU Space Analysis User's Guide. | ||
|
|
The DMU Section boxes are not propagated from an advanced front view to a projection view, nor to an auxiliary view. | ||
|
|
You can use selection sets to generate advanced front views displaying a selection of elements only. Selection sets let you select the sub-bodies and/or sub-products from which the view will be generated. Refer to Creating a front view using selection sets for more information. | ||
|
|
|||