|
This task will show you how to update list of CATDrawing
documents which are file or ENOVIA LCA based in batch environment. The batch monitor
lets you create as many batch configurations as required, and follow the
progress of an update. Updating drawings via the batch monitor will be
particularly helpful if you need to update a great number of drawings (but
do not need to visualize them while doing so), or drawings which require
large CPU resources.
For more details on using the batch monitor, refer to Using the Batch
Monitor in the Infrastructure User's Guide. |

|
-
Run the CATUTIL command, using one of the methods
described in the Infrastructure User's Guide. For example,
from a V5 session, choose Tools > Utility. The batch
monitor appears, listing available batches.
-
From the
list of available batches, double-click
PLMBatchDrawingUpdate.
-
The
PLMBatchDrawingUpdate dialog
box is displayed.
-
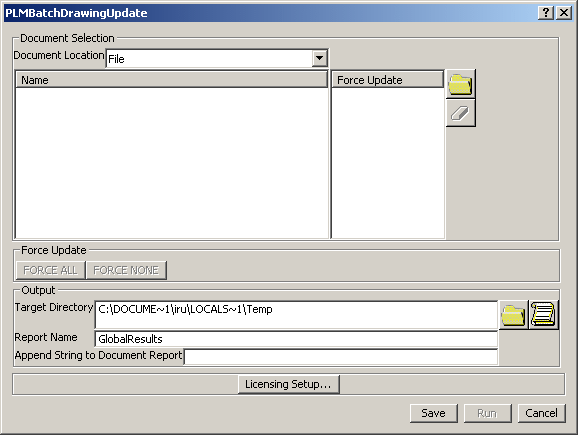
Choose the
Document Location as either
File or
ENOVIA LCA.
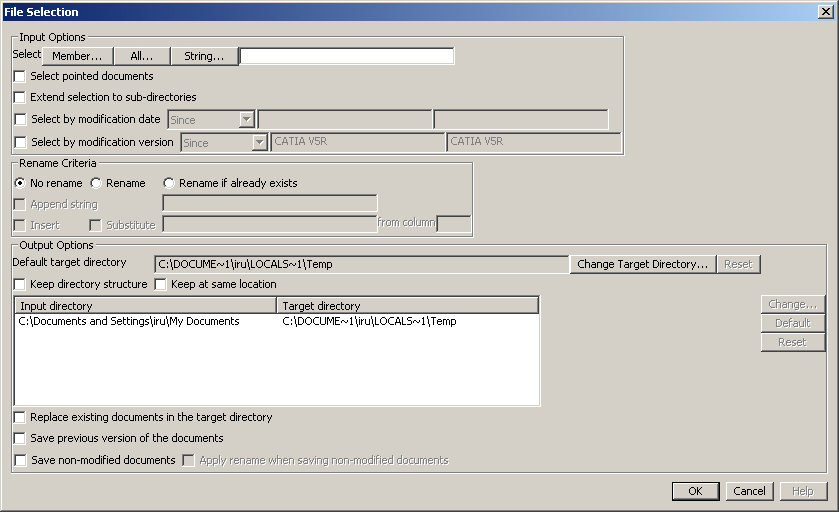
- If you choose
File then
the following
File Selection dialog box is displayed.
- Click
Member... button in the
Input Options field to select the
files to be updated.
-
Output options field can also be modified to save the updated CATDrawing documents as required.
Select the target directory in
the
Default Target Directory
field,
where you
want the updated files to be saved. A dialog box is displayed.
Browse to the directory in which you want to save the
updated files, select it and click OK. Each time you run the update batch, updated files present
in this target directory will be overwritten by the newly updated files.
Click
OK.
|
| |
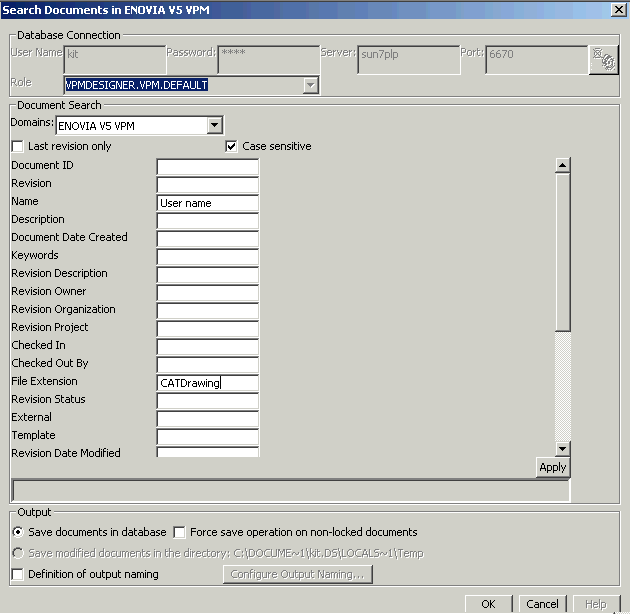
- If you choose
ENOVIA LCA this will bring up the
Search Documents in ENOVIA LCA
dialog box.
Connect to the database by providing the
standard log in information and click the
Connects to the database
 button. button.
|
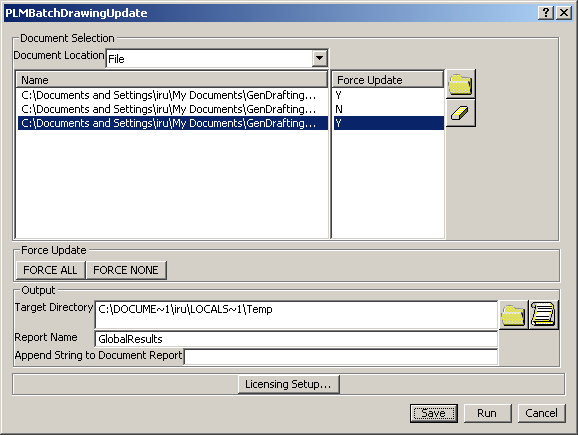
-
List of documents is stored in the
Document ID
field of the main
PLMBatchDrawingUpdate dialog box.
 |
You can remove unwanted files from the list of the files
to update. To do so, select the unwanted file and click
the
Eraser
button.
|
-
You
can decide to force the update for certain files, or for all of them. To
do this, click on the document ID (this will toggle the
Force Update
value between
Y
and
N)
for each file for which you want to force the update. A value setting of
Y,
which means the update will be forced whether the document has been
modified or not.
-
Select the target directory in
Target
Directory
field, where you want to generate the
result HTML file.
A dialog box is displayed. Browse to the directory, select it and click OK.
-
Click the Save button to specify where you
want to save your batch parameters. A dialog box is displayed.
-
Browse to the directory in which you want to save the
batch parameters file, specify a file name in the appropriate field, and
click Save. Your parameters are saved in an xml file.
-
You can now either click Run to run the batch
immediately or click Cancel to close the
PLMBatchDrawingUpdate dialog
box and run the batch later. For the purpose of this scenario, click Run.
The batch execution starts.
-
During or after the batch execution, you can get more
information on the process in the
Processes
tab; the batch name, the batch identification number, the status (in
progress or ended) as well as the start and end time.
When the batch execution is over, you can exit the batch monitor.
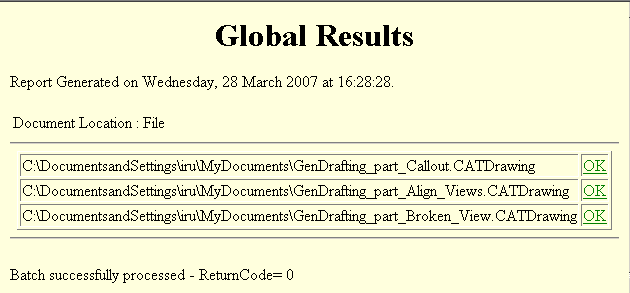
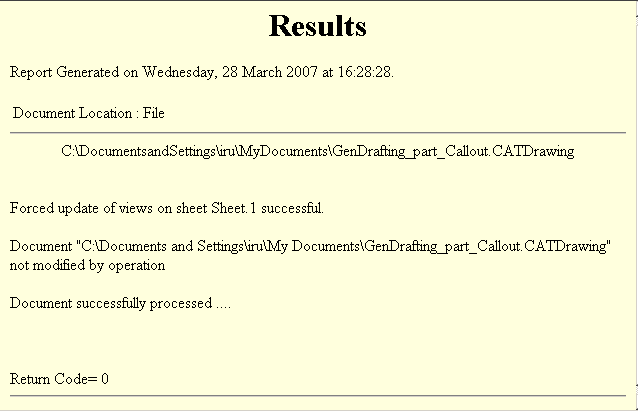
-
After the batch execution, the output HTML report file
can be viewed.
Click on individual document link, to get
details about individual updated documents.
|