Swept Volume functionality:
Lets you generate the swept volume of a moving part in the axis system of another moving part. It can be very useful if you need to perform clash detection or if you need to calculate the minimum distance between two products. For more detailed information, refer to More about Swept Volume.
Note: This sample includes a Kinematics mechanism, therefore make sure you have a DMU Kinematics license to perform this scenario.
-
(Optional) Manage automatically your result as an alternate shape. For this:
- Select Tools > Options from the menu bar.
The Options dialog box is displayed. - Expand the Digital Mockup category from the left-hand tree.
- Select DMU Optimizer item to display the corresponding tab. The Alternate Shapes Management is available
- Select the Swept Volume check box: it is automatically activated as an alternate shape. When activated the swept volume representation is the one visualized in session.


Make sure your simulation or track is set to the beginning step before launching the swept volume computation. - Select Tools > Options from the menu bar.
-
Click Swept Volume
 .
.
The Swept Volume dialog box is displayed.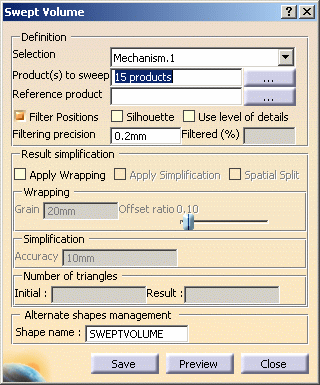
-
Clear the Filter Positions check box, which is selected by default.
-
Select the product you want to sweep. In our example, select:
- Exit_Shaft.1
- Knuckle.1
- Movement_Converter.1
When you are satisfied, click OK. -
Click
 to
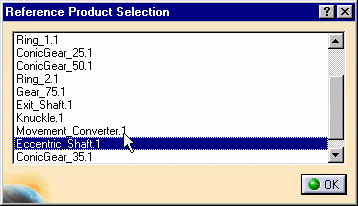
display the Reference Product Selection dialog box:
to
display the Reference Product Selection dialog box: -
Select Eccentric_Shaft.1 as reference product.
-
Click Ok to confirm your operation. The Swept Volume dialog box is automatically updated.

-
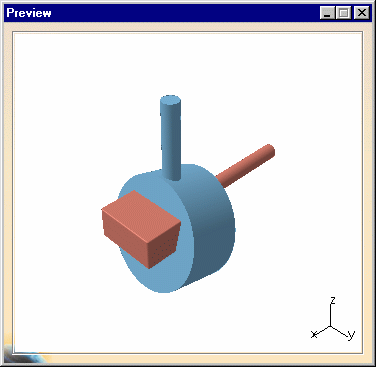
Click Preview to generate the swept volume. The Preview window shows the result.
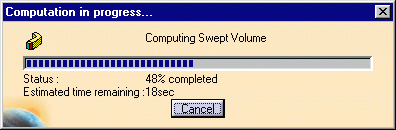
The progress bar is displayed letting you monitor and, if necessary, interrupt (Cancel option) the calculation.
-
Click Save.
-
The Save As dialog box automatically appears.
-
Enter a meaningful name (in our example add a suffix _MOVING_REF to the first swept volume name) and save in the desired format (use the Save as type drop-down list, in our example keep .cgr format)
-
Identify the folder in which you want to save the file.

-
Multiple save management for swept volume
You no longer need to repeat the operation with the next swept volumes as the option Use one directory and save in one click is selected by default, in Tools-> Options-> DMU Optimizer... please read Save Management for Swept Volume
This means, the next swept volumes will be automatically saved within the same directory (i.e. the one you selected), as follows:
- Knuckle.1_SWEPTVOLUME_MOVING_REF .cgr
- Movement_Converter.1_SWEPTVOLUME_MOVING_REF .cgr

Notes: - Their names are built as follows: product_name_shape_name._format_type (The saving operation retrieves what you added to the first swept volume name you saved and takes it into account when building the following swept volume names).
- It is strongly recommended to select an empty directory not to overwrite existing swept volume results.
-
Click Close to exit the swept volume functionality.
Now, insert the swept volume results into your product Note: a swept volume is created for each product selected: - Exit_Shaft.1_SWEPTVOLUME_MOVING_REF.cgr
- Knuckle.1_SWEPTVOLUME_MOVING_REF.cgr
- Movement_Converter.1_SWEPTVOLUME_MOVING_REF.cgr, therefore, you can reinsert all swept volume documents in the product or only the one of your choice.
-
For instance, right-click Stamper in the specification tree.
-
Select Components->Existing Component from the contextual menu displayed.
-
Select Exit_Shaft.1_SWEPTVOLUME_MOVING_REF.cgr from the samples folder (
online\cfysm_X2\samples\DMUApplications\sweptvolumes)This is what you obtain: 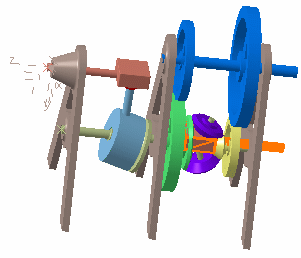
The swept volume result is identified in the specification tree. 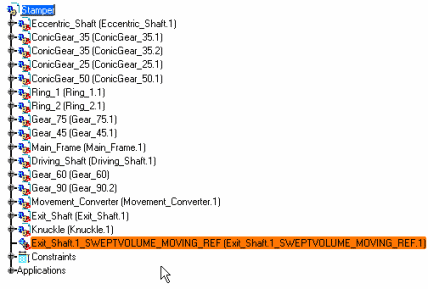
![]()