-
Click the Create an Annotated View icon
 from the DMU Review Creation toolbar.
The 2D view is defined and identified in the specification tree.
You can now customize this view.
-
Adjust the different view parameters (zoom, rotation, etc.) until you are satisfied with the result.
")
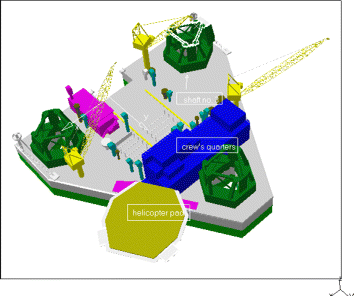
The 2D Marker toolbar is active and you can now annotate your view.

-
To add text, click the Text
 icon then click where you want to place the text.
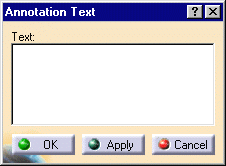
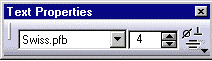
The Annotation Text dialog box as well as the Text Properties toolbar appear:
-
Enter the desired text in the 2D text box, change the text properties if needed and click OK to confirm.
The text is added at the indicated position.
-
Click the Draw rectangle icon
 to create a text box around the text.
Note: You can also add a frame by right-clicking the 2D text and selecting Properties->Text Properties->Frame...
-
Drag across the text you added to create a text box.
-
Annotate your document further as desired.
![]()