- in ENOVIA:
- cgm format
- CATDrawing format
- V4 model
- dxf/dwg format
- raster formats (bmp, jpg, tiff, rgb, pcx, etc.)
- in CATIA:
- cgm format
- raster formats (bmp, jpg, tiff, rgb, pcx, etc.)
This task explains how to compare two versions of the same drawing to highlight the differences and check for changes.
You can now compare and calibrate raster drawings.
You can now compare vectorial drawings using resizing and offset values.
You can now also compare raster drawings using resizing and offset values.
You can now modify the colors used when comparing vectorial drawings.
-
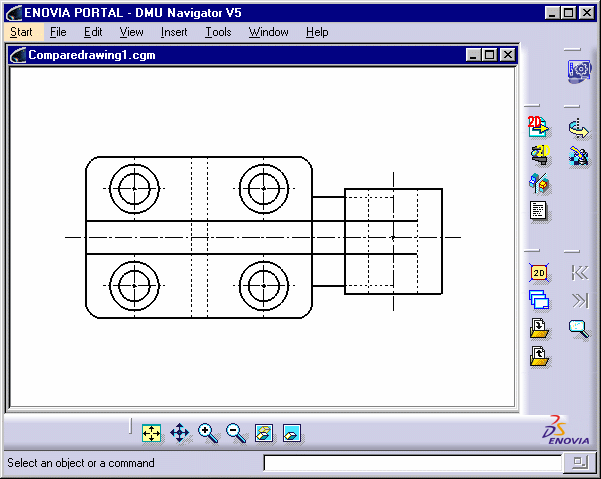
Select File ->Open and open Comparedrawings1.cgm.
The Digital Mock-up 2D workshop is opened and displays the selected drawing. This is the reference to which the second drawing will be compared.
-
Click the Compare Drawing
 icon in the DMU 2D Tools toolbar.
The Select Drawing dialog box appears letting you choose the drawing you want to compare with the reference drawing.
-
Select the drawing you want to compare, for example Comparedrawings2.cgm and click Open.
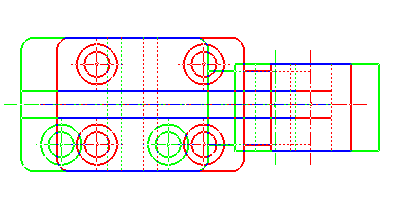
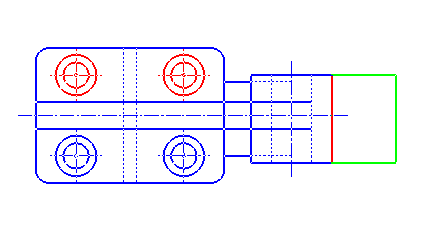
The second drawing is opened and compared to the first.
The Compare Drawing dialog box appears. Selected drawings are identified in the dialog box.

- Elements in drawing 1 only appear in red
- Elements in drawing 2 only appear in green
- Elements common to both drawings appear in blue
These colors can be modified:
- click the corresponding selection button of the color you wish to modify
- choose a color from the proposed list
Note: Colors cannot be modified for raster format drawings.
-
Click appropriate options in the dialog box to visualize drawing 1 or drawing 2 only, or to compare drawings.
-
(Optional) Click Calibrate to align drawings for easier comparison. In our example, this is not necessary.
Note: You need to return to the Compare Drawing option before calibrating.
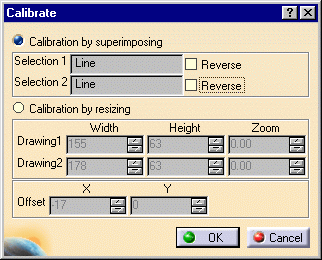
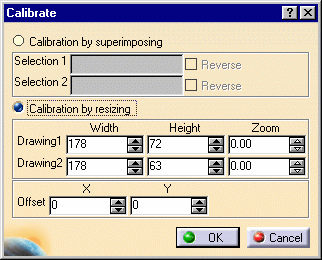
The Calibrate dialog box appears.
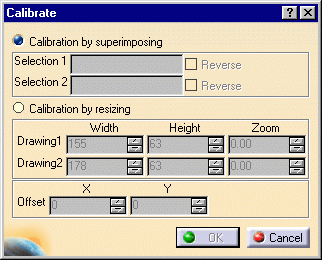
- Click the Calibration by superimposing radio button.
- Select a reference line or axis in one of the drawings.
- Select a line or axis in the other drawing that you want aligned to the reference.
- Click Reverse to change the direction.
- Click OK.
The two drawings are aligned as defined.
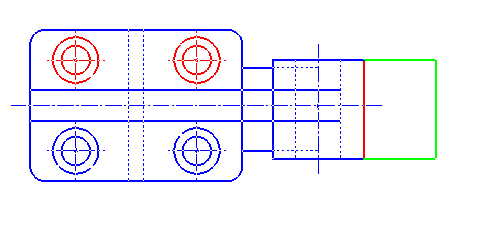
To calibrate by resizing:
- Click the Calibration by resizing radio button.
- Modify the width and height of the drawings as desired.
- Click OK.
The two drawings are resized as defined.
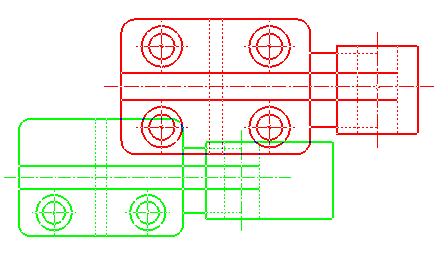
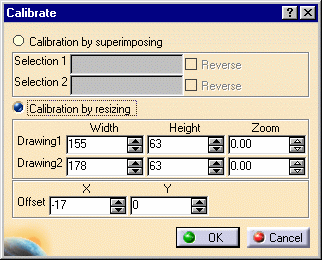
To calibrate by offset:
- Click the Calibration by resizing radio button.
- Enter offset values for the X-axis and the Y-axis.
- Click OK.
Drawing 2 is offset as designated.
-
Click Close in the Compare Drawing dialog box when done.
![]()
