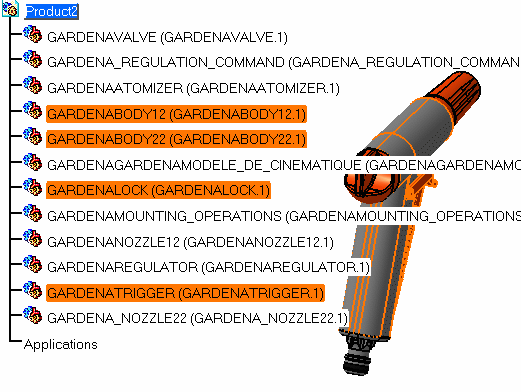
GARDENAATOMIZER.model
GARDENABODY12.model
GARDENABODY22.model
GARDENALOCK.model
GARDENANOZZLE12.model
GARDENA_NOZZLE22.model
GARDENAREGULATOR.model
GARDENA_REGULATION_COMMAND.model
GARDENATRIGGER.model
GARDENAVALVE.model
-
In the DMU Review Navigation toolbar, click the Spatial Query icon
") .
.
The Spatial Query dialog box is displayed: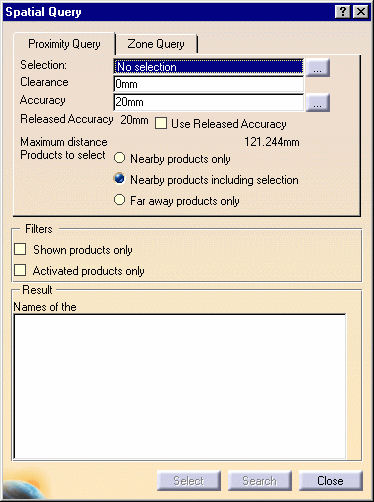
- Shown products only: if checked, the no show products will not be taken into account
- Activated products only: if checked, the inactivated products will not be taken into account
-
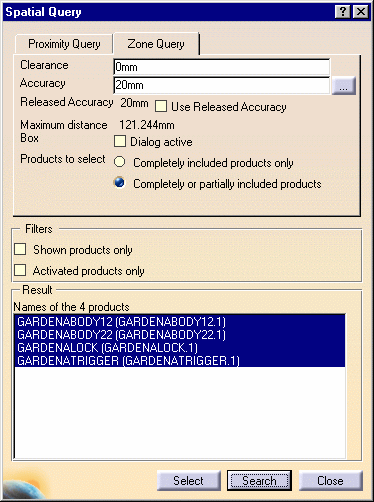
Click the Zone Query tab.
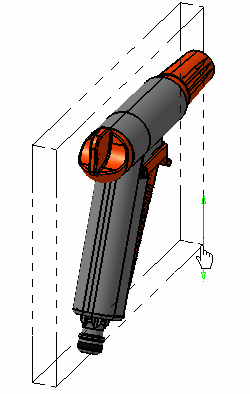
A bounding box appears surrounding the model.

The bounding box has two kinds of manipulators:
- the edges of the bounding box (depicted by dotted lines) enable you to translate the bounding box
- the corners of the bounding box (depicted by solid lines) enable you to resize the bounding box
-
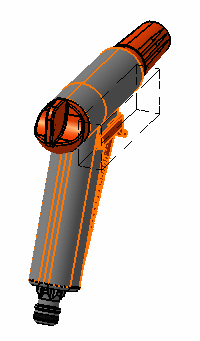
To translate the bounding box, move the mouse over one of the bounding box's edges.
A double-headed green arrow appears along the selected edge, indicating the directions in which you can translate the bounding box.

-
Click and drag in the desired direction.
The bounding box is translated accordingly.
-
To resize the bounding box, move the mouse over one of the bounding box's corners.
A double-headed green arrow appears along the selected corner, indicating the directions in which you can resize the bounding box.
-
Click and drag in the desired direction.
The bounding box is resized accordingly.
-
Using any combination of translates and resizes, define the bounding box you wish to apply for your zone query.
-
In the Spatial Query dialog box, define which products you wish to select (only products completely included within the bounding box or products either completely included within or partially included within) by clicking the corresponding Products to select radio button.
-
Click the Search button to launch the query.
The result is displayed in the Result zone of the dialog box. -
To keep the selection, click the Select button.
-
To keep only the selected parts in the show space, in the Specification Tree, right-click the selection and choose Selection Mode -> Others in the contextual menu, then send this selection to the hide space by selecting Views -> Hide / Show -> Hide / Show.
You can now work with a simplified product.
A Filter option enables you to filter out certain elements from the query result:
- Shown products only: if checked, the no show products will not be taken into account
- Activated products only: if checked, the inactivated products will not be taken into account
![]()