Inserting a Component
-
In CATIA specification tree, select the document you wish to replace from the assembly.
-
Select SmarTeam > Assembly Management >
 Insert Component.
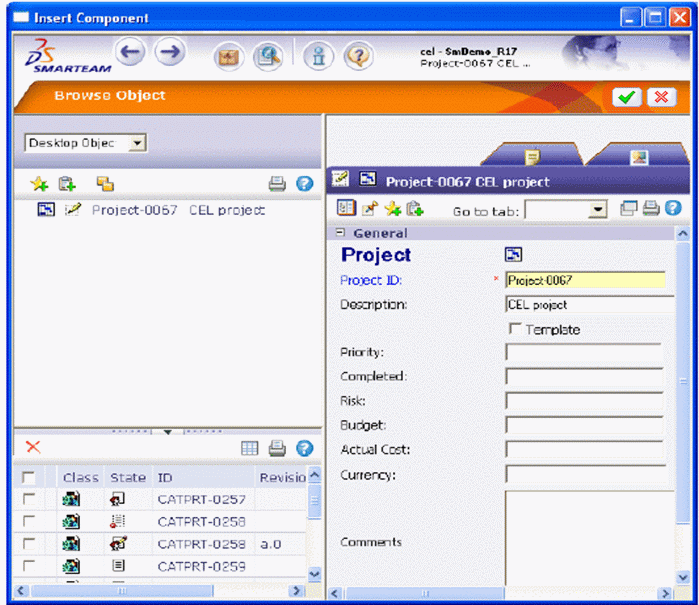
The Insert Component dialog box that appears, displays your leading project to let you access the required parts or products.
-
Select the document you want to insert.
This displays the corresponding profile card to the right of the dialog box. You can then check if it this is the part you wish to insert in your CATProduct document. -
Click OK
 to confirm the insertion.
The CATProduct document now contains the inserted document. More precisely, that document is a read-only copy of the original document still in the vault.
Replacing a Component
Perform the same steps as for component insertion described above but this time select SmarTeam > Assembly Management > Replace Component.
Replace with Selected Revision
-
In CATIA specification tree, from your assembly select the document you wish to replace.
-
Select SmarTeam > Assembly Management >
 Replace with Selected Revision.
The dialog box that appears, displays all revisions related to the document to be replaced.
-
Select the revision you want to use.
The Copy File dialog box is displayed. -
Click Ok
to confirm the change.