![]()
-
Click the Creates Symmetric Plies icon
 .
.
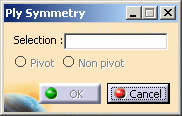
The Ply Symmetry dialog box is displayed.
-
Select a Plies Group in the specification tree, Plies Group.1 for instance.
-
Select the Non-pivot option, then click OK.
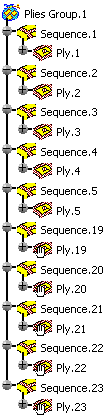
Five new plies are created and an icon of manual creation is displayed on each ply.
Note that the order of the newly created plies is inverted, thus:- Ply.19 corresponds to Ply.5,
- Ply.20 corresponds to Ply.4,
- Ply.21 corresponds to Ply.3,
- ly.22 corresponds to Ply.2,
-
Ply.23 corresponds to Ply.1.
-
Open the Symmetry1.CATPart document again.
-
Click the Creates Symmetric Plies icon.
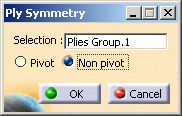
Select Plies Group.1 in the specification tree.
Select the Pivot option, then click OK.
This time, only four plies are created since Ply.5 is used as a pivot, thus:- Ply.19 corresponds to Ply.4,
- Ply.20 corresponds to Ply.3,
- Ply.21 corresponds to Ply.2,
-
Ply.22 corresponds to Ply.1,

- There is no link between symmetric plies. In our last example, if Ply.22 is modified, Ply.1 is not impacted.
- You can also create a symmetry on a stacking, but only the Non-pivot option is available if there is one Plies Group. If several Plies Groups are available, the Pivot option is available and the symmetry is applied to the last Plies Group.
- The plies of a copied sequence are not inverted as the manufacturing order cannot be modified.