-
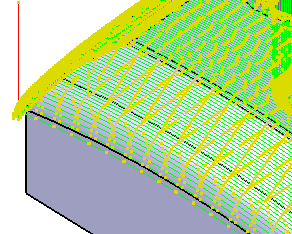
The tool path and a dialog box are displayed.
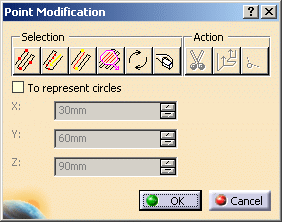
The dialog box offers several selection methods
-
As you pass the mouse cursor over the tool path you will notice that a small white square moves along the tool path. Click where you want to select a point.

The point must belong to the selected tool path. - The
Selection bar
 proposes other
options.
proposes other
options.
-
-
Once the points are selected, you can move them:
-
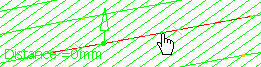
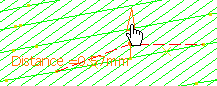
Pull the Distance arrow to the place you want the point to be in the viewer.
The distance between the original position and the current position of the points is displayed as you move the arrow. -
or enter the coordinates where they should be in the spin boxes.
Just as above, an arrow is displayed as well as the distance from the original position of the points. -
or double-click the word Distance and enter the distance in the box.

-
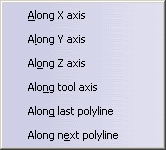
Use the contextual menu on Distance to select the translation direction

Click Move  to validate the modification.
 -
-
To remove points, click Cut
 .
. -
Click OK to validate and revert to the Tool Path Editor dialog box.
Inserting a point
-
Once the tool path and the dialog box are displayed, pick a point to select it.

-
One point on each side of the selected point are proposed and visualized by a yellow cross.
They are at the middle of the segment defined by the selected point and the next point on each side.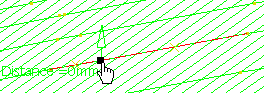
-
Pick the proposed point you want to create and click Insert that is now available:

-
Click OK to validate and revert to the Tool Path Editor dialog box.
 |
![]()