- component position
- component hide / show status
- component graphical properties
- component activation status
-
Double-click Scene.1 in the specification tree to activate the Enhanced Scene.
-
Click the Apply Scene on Assembly icon
 .
.
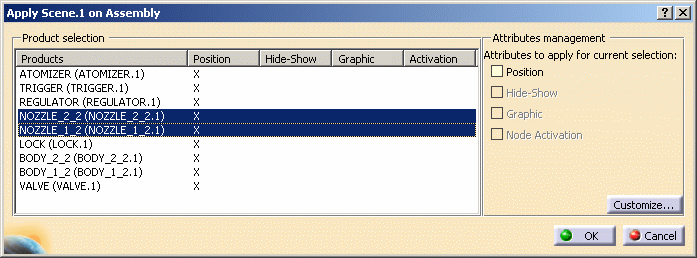
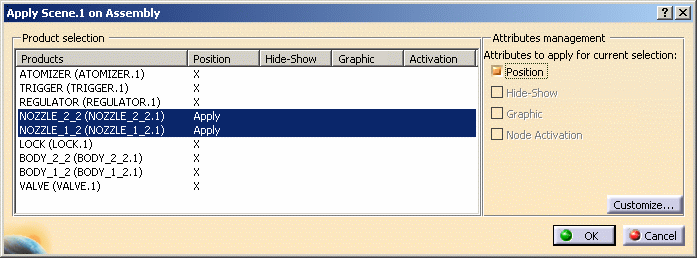
The Apply Scene.1 on Assembly dialog box is displayed.
All differences between the Assembly and the Enhanced Scene are indicated by an "X" in the dialog box.
-
Select the products for which you wish to apply modifications.
The rows corresponding to the products will be highlighted.
In the Attributes management area, the attribute types that could potentially be applied as a function of the selected products will be un-grayed (in the above example, only the Position attribute has been modified for the selected products, so only the Position attribute type has been un-grayed). -
In the Attributes management area, click the attribute types of the modifications you wish to apply.
The entry in the table of the corresponding modification will change from "X" to "Apply".
-
Click OK to validate.
Using the Contextual Menu
You can use the contextual menu to:
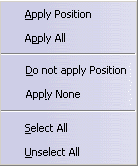
- select all product rows or to unselect all product rows
- designate selected attributes as "Apply" or "X" (Do not apply)
As an example:
- in step 3 above you would still select the product rows manually
- in step 4 above you would right-click the selection, which would display the following contextual menu (because only position attributes are potentially applicable from the Enhanced Scene onto the Assembly):
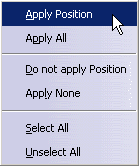
- you would select Apply Position (or Apply All) to designate the selected attributes to be applied:
Customizing Displayed Attributes
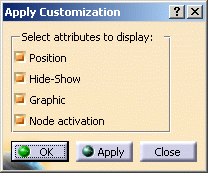
You can customize the list of attribute types displayed in the Attributes management area:
- click the Customize button
- deselect the attribute types you don't wish to appear in the list
- click OK to validate
![]()
