 |
This task shows you how to export:
- a cloud of points or a set of scans to an ASCII_free
file, either as :
- scans, if the selection contains only a scan or a set of scans,
- a cloud of points, if the selection contains only a cloud of
points,
- scans, if the selection contains both.
 |
The scans exported have the following delimiters: G08 for
the start and G09 for the end. |
- a cloud of points to a Cgo file,
- a mesh to a binary STL file.
|
| |
-
Click Export
 .
The Cloud Export dialog box is displayed. .
The Cloud Export dialog box is displayed.
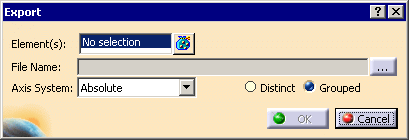
-
Select the cloud of points or the mesh you want to
export.
Its name is displayed in the Element(s) field.
|
|
- Multi-selection is available:
- Click
 to display the list of elements selected.
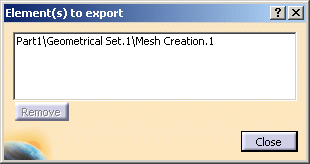
- Click an element in the graphic area or in the
specification tree to add it to the selection list,
Select an element in the list, and click Remove
to modify the selection list.
- Click Close to end the selection and
revert to the main dialog box.
- The number of elements selected is displayed in
the Element(s) field.
|
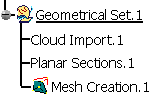
- If you select a composite element (Geometrical set,
CATPart, CATProduct...) only its visible sub-elements (clouds of
points or meshes) will be exported.
- If you select a CATProduct, elements in unloaded
CATParts will not be exported.
- If you select a single element (cloud of point or
mesh), it will be exported, even if it is in the No Show mode.
|
-
Click Grouped if you want to export
all elements into a single file (this is the default option).
Click Distinct if you want to export each element into a
distinct file.
-
Click ... to enter the name and the path of the
file to be created.
The Save As dialog box is displayed:

- browse your disks to the export directory,
- type the name of the file you want to create:
- if you have selected Grouped, this will be
the name of the export file.
For example, if you export:
and type export as File name, you will
create:

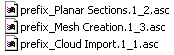
- if you have selected Distinct, the names
of the export files have this structure:
prefix_name of the element_suffix.format
you type the prefix in the File name field,
the name of the element is taken from the elements selected,
the suffix is a figure corresponding to the place of the
elements in the specification tree.
For example, if you export:
and type prefix as File name, you will
create:
- select the format of the file you want to create.
- click Save to revert to the main dialog box.
|
|
|
Note that only STL is available in the STL Rapid Protyping
workbench. |
-
Select in which Axis System you want
to export the selection:
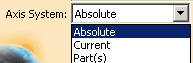
Absolute: the selection will be exported using the axis system
of the root of the document,
Current: the selection will be exported using the current
axis system,
Part(s): the selection will be exported using the current
axis system of each CATPart containing the selected elements. This
option is available only is Distinct is selected.
-
Click OK. The export files are
created.
If you have selected a format that is not coherent with the elements
selected, a message is displayed, and the files are not created, or
contain only the compatible elements.
|