The following instructions describe the DCOM setup on the PPR server.
- To perform the following steps, you must be logged in as administrator on the PPR server machine.
-
Install the PPR server using the given installation procedure. (Install the PPR client on the same machine to ensure that E5 is running correctly.)
Define a local administrator user
Use the Windows User Manager to define a domain user having local administrative privileges on the server machine. This user will be used for the DCOM settings.
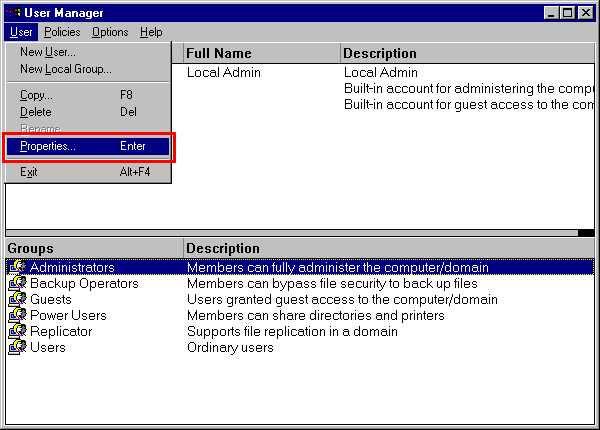
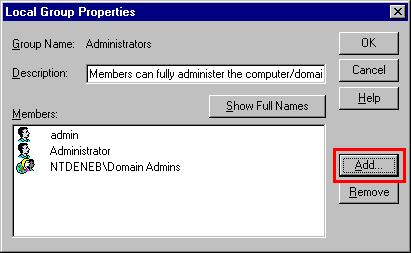
Select the user to add in the next panel, click on Add button and then on the OK button to confirm this action. It is very important that the user selected is from your Windows domain and not a local user.
DCOM Settings
Launch distributed COM configuration
Select Start > Run from the Windows taskbar.
Enter the command "DCOMCNFG" in the Run dialog box, and click OK to launch the program.
The first time DCOMCNFG is launched on a given machine, it may display a confirmation dialog box asking you to accept some key numbers. Accept the numbers by selecting Yes in these dialog boxes.
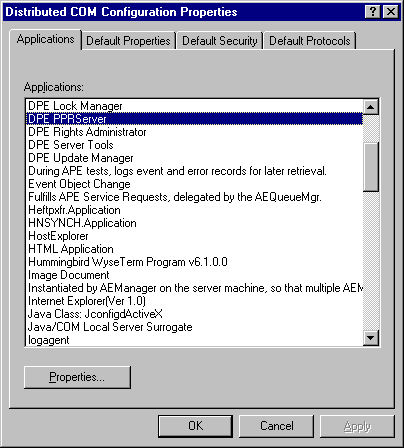
COM Settings

DPE PPR Server Setup
Select the Applications tab and select the DPE PPR Server application:
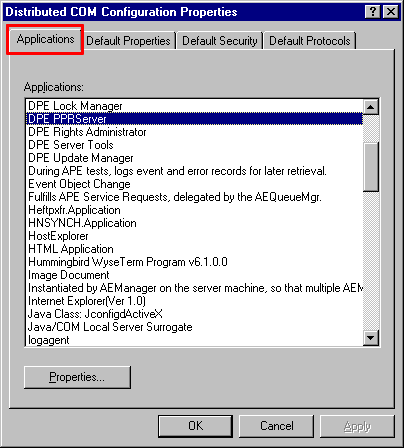
Select the Properties... button to display the DPE PPRServer Properties dialog box.
Select the Security tab.
Set access permissions.
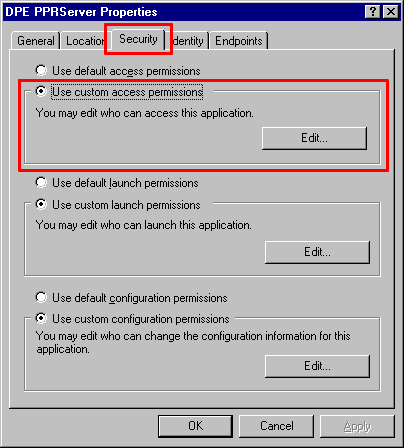
To set access permissions, select the Use custom access permissions option and click its associated Edit... button:
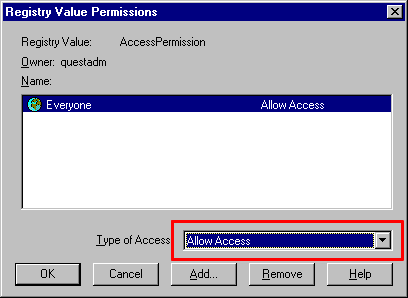
A Registry Value Permissions dialog box will then be displayed. Using the standard Windows procedure of providing permissions, Allow Access permissions to the relevant persons. (Usually the Access permission is given to Everyone):
Select the OK button when done to close the Registry Value Permissions dialog box and go back to the DPE PPRServer Properties dialog box and Security tab.
Set launch permissions.
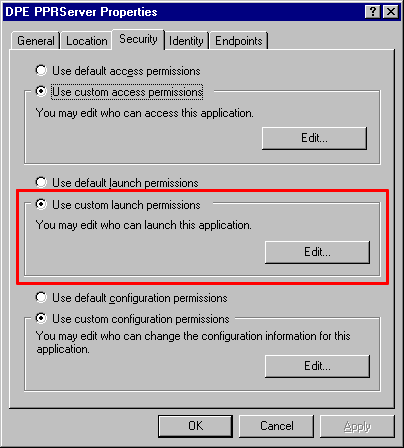
To set launch permissions, select the Use custom launch permissions option and click its Edit... button:
This will bring up the Registry Value Permissions dialog box:
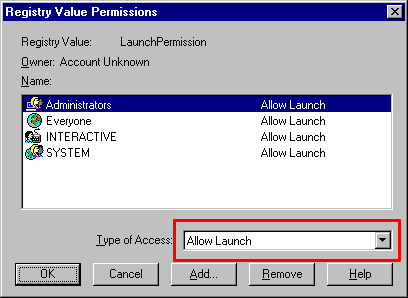
Using the standard Windows procedure of providing permissions, Allow Launch permissions to the relevant persons. (Usually the Launch permission is given to Everyone). Select the OK button when done.
Set the authenticating user.
The user who authorizes the launching of the DCOM processes on the PPR server machine must also be set. This user should be:
- A Domain login (exist on the local Windows Network domain).
- A power-user or administrator on the PPR server machine, to be able to launch the DCOM processes.
Select the Identity tab of the DPE PPRServer Properties dialog and enable the This user radio button:
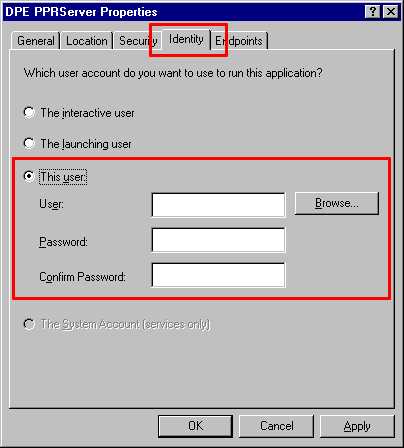
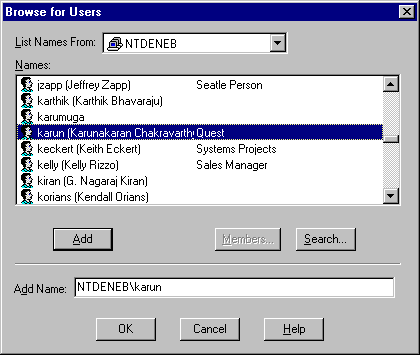
Select the name of the authorized person (the Domain user defined as a local administrator in the 1st step of the DCOM settings). Select the OK button when done.
The User field in the Identity tab will now display the selected user name:
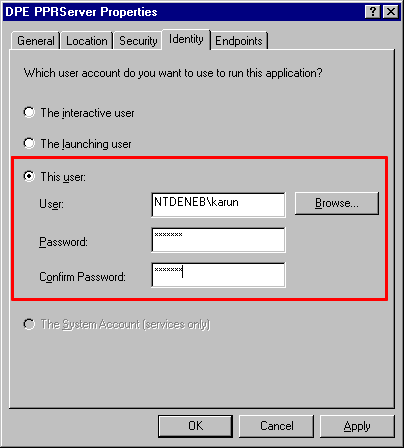
Other Process Engineer DCOM settings
- DPE Lock Manager
- DPE Rights Administrator
- DPE Server Tools
-
DPE Update Manager
Server reboot
The PPR Server machine does not need to be re-started for the settings to take effect (unless DCOM had to be enabled on this machine).
DCOM settings for multiple clients on Novell networks without a Windows Domain Controller
- In this case, the user for DCOM identity stays the same.
- On the clients, this user must be created. This means that if a local user "DELMIA_DCOM" (for example) is used for DCOM identity on the server, a user "DELMIA_DCOM" must be created with the same password on each PPRClient.
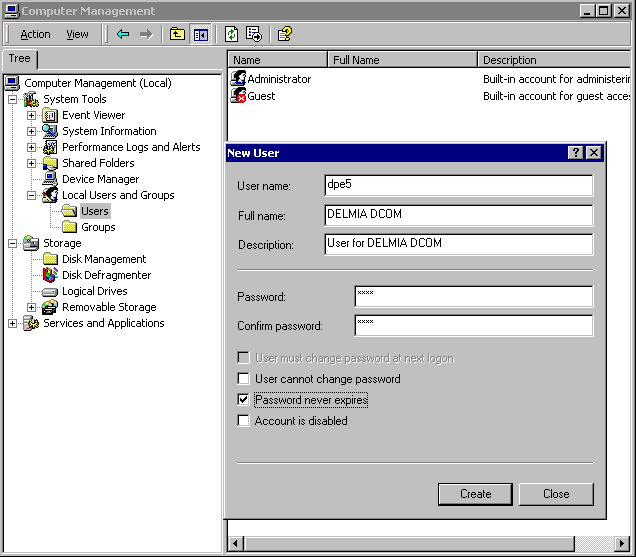
This solution is possible in Windows domains if there is no domain user available. For example:
username: dpe5
password: dpe5
In a Novell network without a Windows Domain, the user dpe5 (in this example) must exist on the server machine as a local user with administrator privileges and on all clients as a local user with the same password as on the server.

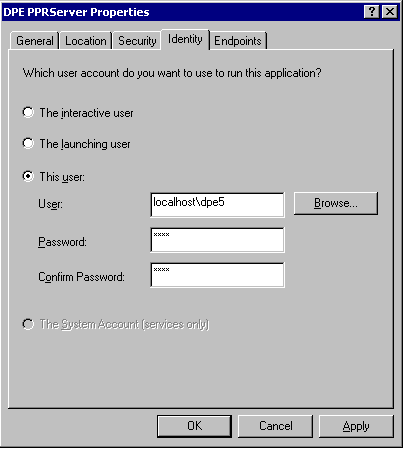
On the client machines, the user dpe5 with password dpe5 must also be created:
Authentication
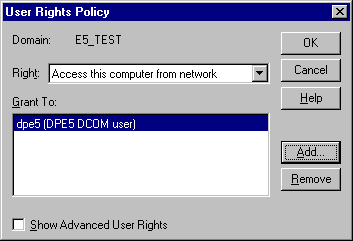
For authentication from server to client, an additional policy for accessing the client must also be set.
On Windows, select User management > Policy > User Rights > Access this computer from network > Add > user "dpe5" (the DCOM identiy user):

Note that the dpe5 username and password are only used as examples in the scenario above. Any name may be
used, however it is important to use the same username and password for the client, server and DCOM-identity on the
server.