- A Knowledge Advisor law is a relation whereby a parameter is defined with respect to another. Both parameters involved in a law are called formal parameters. Formal parameters and laws are specifically designed to be used in the creation of shape design parallel curves. A Generative Shape Design law can be used in a Knowledge Advisor law.
- Laws only specify a relation between one parameter and another single parameter.
-
From the Start>Shape menu, access the Generative Shape Design workbench.
-
Define a working support using the Work on Support icon (
 ).
).
-
Select the zx plane, for example, and click OK in the updated Work on Support dialog box without modifying any other parameter.
-
Click the Line icon (
 ).
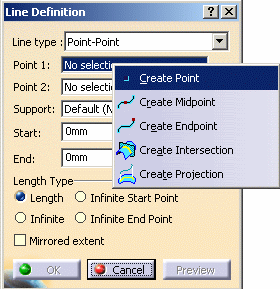
The Line dialog box is displayed.
 -
Right-click in the Point 1 field, and choose the Create point command.
-
The Point Definition dialog box is displayed, the Point type and Plane fields being automatically filled.
-
Create a point at H:0mm and V:0mm, and click OK.

-
Repeat the operation, right-click the Point 2 field from the Line dialog box to create another point at H:100mm and V:0mm, then click OK in the Point Definition dialog box.
-
Click OK in the Line dialog box to create the line.
-
Access the Knowledge Advisor workbench and click the
 icon. If need be, use the Tools>Customize command to access
the icon. A dialog box similar to the one below is displayed. This editor
is similar to the other relation editors. If need be, replace the default
values specified in the dialog box fields.
 -
Click OK. The law editor is displayed. The right-hand part allows you to create the parameters to be used in the law. The left-hand part is the law edition box.
-
Click New Parameter of type to create two real type parameters FormalReal.1 and FormalReal.2, then enter the law below into the edition window:
FormalReal.1 = 5*sin(5*PI*1rad*FormalReal.2)+ 10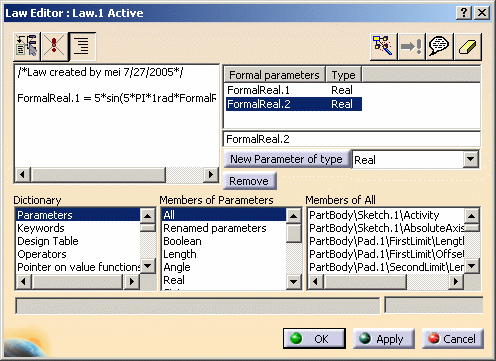

For more information about the new buttons available in the Law Editor, see the Knowledge Advisor User's Guide. -
Click OK to add the law to the document. The Law.1 feature is added to the specification tree right below the Relations node.
-
Select your document root feature and re-access the Generative Shape Design workbench.
-
Click the
 icon to create a curve parallel to the line created at the very beginning
of the scenario. The Parallel Curve Definition dialog box is
displayed.
 -
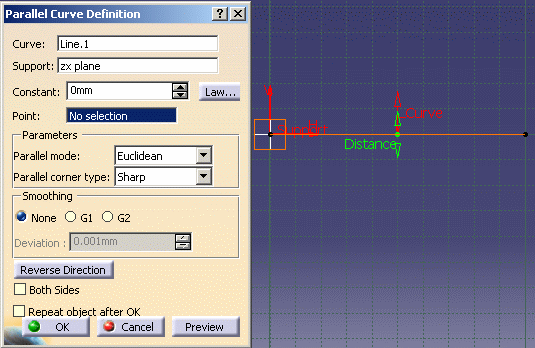
Select the line that you previously created as the reference Curve.
|
|
Note that only positive laws, i.e. with positive values only, can be used when creating parallel curves (positive is to be understood as "strictly positive"). |
-
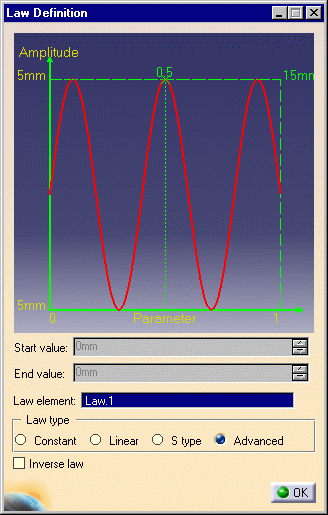
Click Law .... The Law Definition dialog box is displayed.
-
Click the Advanced Law type, click Law.1 in the specification tree and click Close.
-
Click OK. A curve parallel to the selected one is created, taking the law into account.
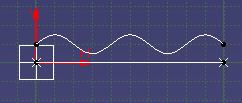
The KwrCreatingaLaw.CATPart sample illustrates this scenario.