-
Open the Screw1.CATPart document.
-
Add a Volume parameter to the part.
- Click the
 icon. The Formula Editor opens. In the New parameter of type
scrolling list, select Volume and click New
parameter of type.
- In the Edit name or value of the current parameter field, enter the name of the parameter: ScrewVolume1. Click Apply and click Add Formula. The Formula Editor opens.
- Enter the following formula by using the Dictionary to access the smartVolume operator: ScrewVolume1=smartVolume(PartBody\Pad.1). Click OK three times.
- Click the
-
Create another Volume parameter called ScrewVolume2 based on Pad.2.
-
Create another Volume parameter called Volume_Total. Click OK when done to exit the Formula editor.
-
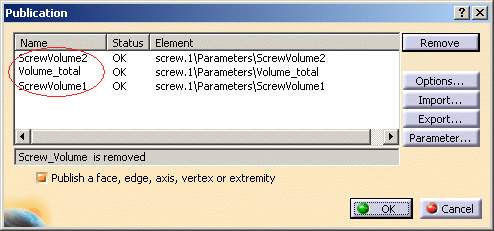
Access the Tools>Publication menu, and select the 3 parameters that are displayed below the Parameters node. Assign them new names (see graphic below):

-
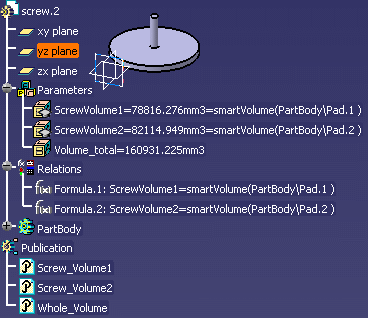
Click OK when done. The parameters, the formulas, and the publications are created (see graphic below).

-
Save your file and close it.
-
Open the Screw2.CATPart document. Repeat the above steps (2 to 7).

-
Create a product (File>New menu). Click OK when done.
-
Select Insert>Existing Component... to insert Screw1.CATPart into the product.
-
In the File Selection window, select the Screw1.CATPart file that you have just saved. Click Open.
-
Create a formula that will compute the volume of the screw.
- Click the Root product and click the
 icon. The Formula Editor opens.
- Enter the following formula into the editor by selecting the
publications in the specification tree:

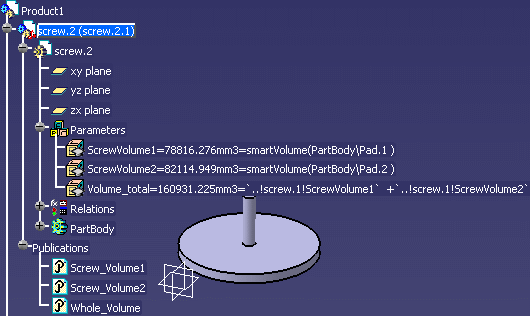
- Click OK when done. The screw volume is displayed below the parameters node.

- Click the Root product and click the
-
Double-click screw.1 in the specification tree, right-click it, and select Components>Replace Component.
-
In the File Selection window, select the screw2.CATPart file that you have just saved and click Open.
-
Click OK in the Impacts On Replace window. The new screw is inserted into the product and its volume is computed.

![]()