This option is activated by default when opening the workbench for the first time.
- Selecting a 3D annotation will highlight:
- The 3D annotation itself.
- All the geometric element that are components of the tolerancing feature (user surface or group of user surfaces) it is applied to.
- All the constructed geometry attached to the tolerancing feature and all its components.
- All the represented geometry associated with the geometric element
that are components of the tolerancing feature and created using:
- The constructed geometry commands
- The datum plane direction geometric element involved in the semantic datum definition applied on a complex geometry.
- All the framed (basic) dimensions that are related to the specification.
- All the datum feature annotations that are related to the specification (for semantic geometric tolerance only).
- Selecting a geometrical element will
highlight:
- The geometrical element itself.
- All the annotations that are applied (directly or indirectly) to it.
- All the framed (basic) dimensions that are related to the corresponding specifications.
- All the datum feature annotations that are related to the specifications (for semantic geometric tolerance only).
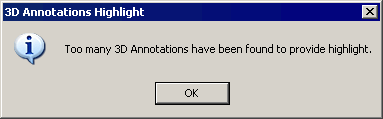
- Note that when you select more than 20 geometrical elements, the
annotations highlight is disabled in order to avoid visualization and
performance depreciation.
Furthermore, a warning message is displayed:
- Selecting a Part Design or Generative Shape
Design feature or a restricted area in the specification tree will
highlight:
- The feature itself.
- All the annotations that are applied (directly or indirectly) to all its geometrical components.
- All the framed (basic) dimensions that are related to the specification.
- All the framed (basic) dimensions that are related to the corresponding specifications.
- All the datum feature annotations that are related to the specifications (for semantic geometric tolerance only).
- Make sure that the 3D Annotation Query Switch On/Switch Off
icon
 is
activated.
is
activated. - Improve the highlight of the related geometry, see Highlighting of the Related Geometry for 3D Annotation.
-
Select the annotation as shown:
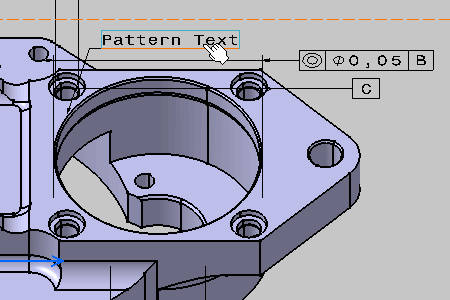
This location specification is defined on a pattern of holes. 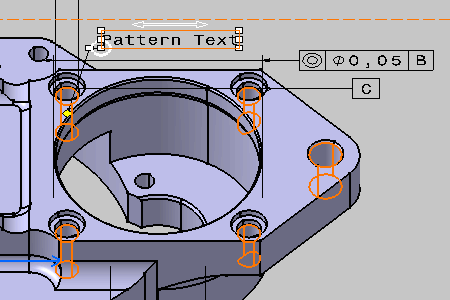
Any toleranced face hole of the pattern is then highlighted. 
-
Select the yellow manipulator and start dragging the arrow head.
A yellow temporary trace is displayed. It corresponds to the intersection between the annotation plane and the corresponding toleranced elements. This trace defines all the possible positions for the arrow head that are semantically correct for the selected tolerancing annotation. 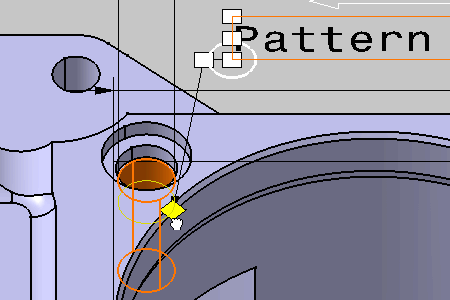
In our example, the toleranced elements are a group of five holes, this is why we obtain five yellow traces: 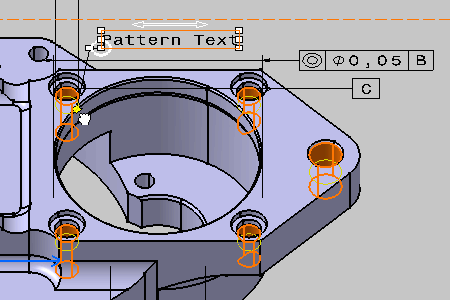
-
For example, drag and drop the arrow head on another trace to the right. You can obtain this:

-
Now, select Pad.2 in the specification tree. As you can see, the pad is highlighted in the geometry area, as well as all annotations which are applied to it.
This functionality is demonstrated here using a Part Design feature, but it is also available for Generative Shape Design features. 
You can add the 3D-Annotation-Query Switch On/Switch Off command to another workbench via Tools > Customize. For more information, refer to the Customizing Toolbars and Workbenches chapter in the Infrastructure User's Guide.