![]()
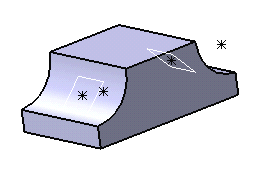
Open the multibaseretainer part document.
![]()
-
Switch to Electrical Part Design
 workbench.
 -
Define the support as a retainer on both side of the part.
To do so: - Click Define Support
 and select the part.
 - Set the parameters in the Support Definition dialog box for the
first side:

For more information, refer to Electrical Library User's Guide (User Tasks - Creating Supports - Creating Retainers). - Repeat these steps for the second side.
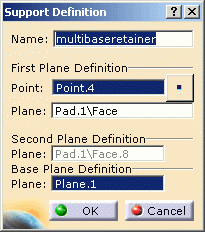
Note: The Second Plane Definition is already set and cannot be changed.
The specification tree shows that the publications are created with the specific retainer parameters: EHISUPPORT-RefBasePlane.1 and EHISUPPORT-RefBasePlane.2.

- Click Define Support
-
Save the part.
-
Switch to Electrical Harness Assembly
 workbench.
 -
Click Geometrical Bundle
 and select Product1.
 -
Insert your part to this product, using the contextual menu: Components >
 Existing Component...
The File Selection dialog box opens.
Select the part you saved in step 3. -
Create a multi-branchable document using Multi-Branchable Document
 .
.
CATIA switch to Electrical Harness Installation workbench. -
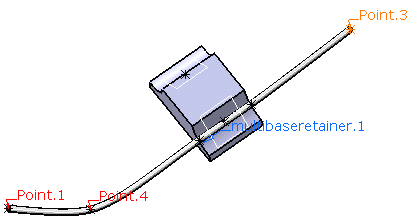
Create few points to route the bundle segments, using Point
 :
: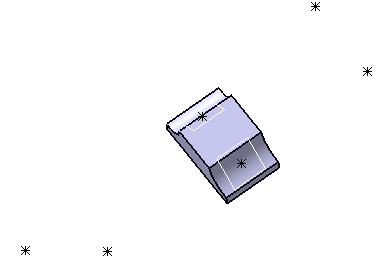
-
Click Multi-Branchable Document
again.The dialog box opens: 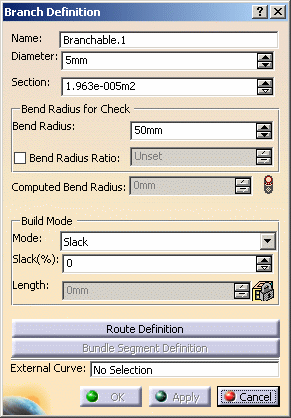
Change the parameters according to your needs. -
Click Route Definition.
The dialog box opens:
- Click successively the points, as shown below:
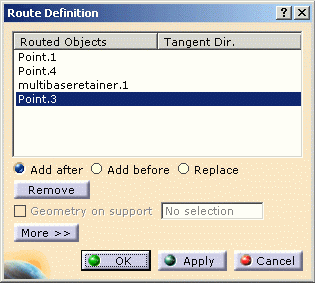
- Click OK to validate.

When you select the retainer, CATIA finds the closest entry point for the branch, according to the selection point. -
Repeat these steps for the second side.
-
Click OK to validate the entries made in the dialog boxes.
The result looks like this: 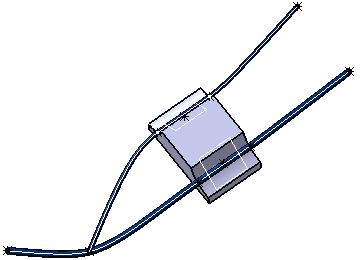
![]()
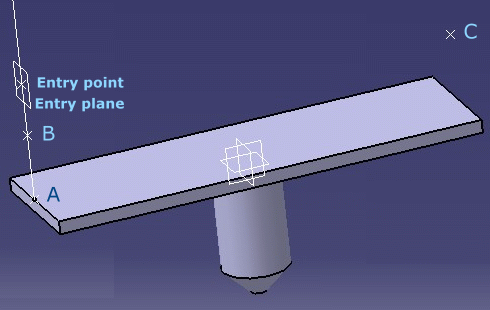
When you route a bundle segment over a retainer:
- The bundle segment curve is built as follows:
- The entry point is published as RefPoint1.
- It is projected to the base plane (RefBasePlane) as A.
- A line is created between A and the entry point (RefPoint1).
- A point (B) is created on this line, knowing that the distance between A and B is equal to the bundle segment radius.
- The point B is projected to RefPlane2 as C.
- The points B and C are added to the bundle segment center curve definition. The slack between these points is ignored.
All the construction objects are sent in No Show space.
The formula is automatically generated under the root product of the document, if the EHISUPPORT-RefBasePlane publication is detected:
length = bundle segment diameter * 0.5
- When the diameter changes, the bundle segment is re-computed according to this formula, to keep in contact with the retainer base plane.
- Using retainer and protective covering:
If the bundle segment is protected by a protective covering, the formula that computes the distance between A and B takes into account the thickness of the covering.
AB = bundle segment radius + protective covering thickness
It is the case when:
- A retainer is added to a protected bundle segment
- A protective covering is added to a bundle segment already linked to a retainer
- The limit points of the protective covering are modified so that it is added to or removed from the retainer.

Note that:
-
Only one section of bundle segment can be taken into account to be kept in contact with the retainer base plane, whatever the diameter is. This means that a branch point created in the middle of the retainer only allows one side of the bundle segment to be updated with the correct diameter.

-
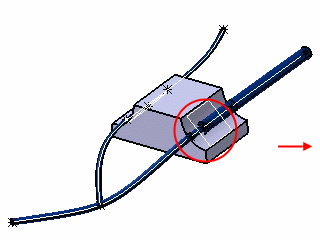
It is not possible to hold concurrently the properties of a retainer and a standard support: either the base plane is taken into account to route the bundle segment or it is the entry point and planes only. The part below cannot be used as a retainer and a standard support.
