In other words, SmartPick returns feedback information (highlighted geometry or symbols) which you will or will not validate.
You will also learn how to progressively specify your needs using the blue cursor, the Sketch tools toolbar, the contextual menu, Shift key or Ctrl key.
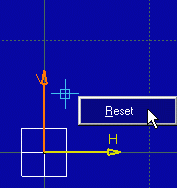
Coordinates
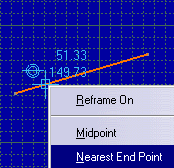
When you move the cursor, H and V corresponding coordinates appear on the screen and also in the Sketch tools toolbar. Note that the coordinate at the top is H and the coordinate at the bottom is V.
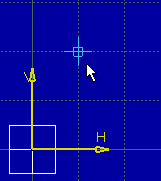
SmartPicking Somewhere On the Grid
SmartPick displays the SmartPick blue cursor that can be snapped to the
grid according the Snap to Point option
![]() from the Sketch tools toolbar. This option is also available in
the Sketcher settings (see Snap to point option in the
Customizing section of this guide).
from the Sketch tools toolbar. This option is also available in
the Sketcher settings (see Snap to point option in the
Customizing section of this guide).
The SmartPick blue cursor is at the grid intersection point and far from the cursor, Snap to Point option activated:
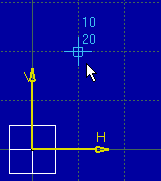
SmartPicking Using Coordinates
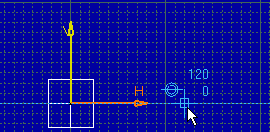
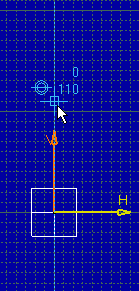
As you move the cursor and try to assign the desired position to the SmartPick cursor, the Sketch tools toolbar similarly displays the corresponding horizontal and vertical coordinates of the SmartPick blue cursor.
You can use the Sketch tools toolbar fields for defining the point coordinates either independently from each other or not.
For example, enter H: 2mm. SmartPick is locked on this value. As you move the cursor the V coordinate appears in the Sketch tools toolbar.
SmartPicking Hiding Coordinates
Unselect the Visualization of the cursor coordinates option in the Sketcher settings (see Visualization of the cursor coordinates in the Customizing section of this guide).
The cursor coordinates are automatically hidden as you move the cursor within the geometry area.
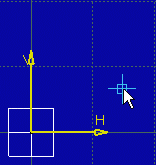
SmartPicking On H and V Axes
As you move the cursor and try to assign the desired position to the SmartPick cursor, a horizontal fictitious blue dotted line appears when v is equal to zero, a vertical fictitious blue dotted line appears when h is equal to zero.
SmartPicking On a Point
When a point is included in the tolerance zone of SmartPick cursor, SmartPick first snaps to the point and the point-to-point coincidence symbol appears.

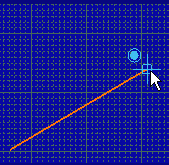
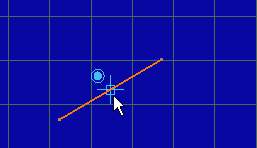
SmartPicking At a Curve Extremity Point
When a fictitious curve extremity point is included in the tolerance zone of SmartPick cursor, SmartPick snaps to the extremity of this curve.
The point-to-point coincidence symbol appears once the point is picked.

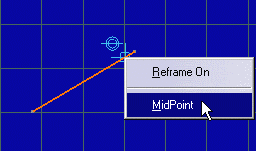
SmartPicking At the Midpoint of a Line
When the midpoint of a line is included in the tolerance zone of SmartPick cursor, SmartPick snaps to the midpoint of this line. The point-to-point coincidence symbol appears once the midpoint is picked and the line is highlighted.
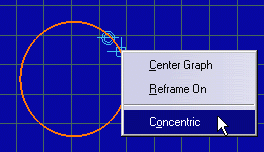
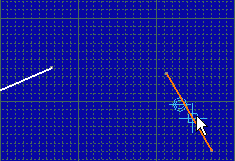
SmartPicking At the Center of a Circle
When the fictitious center of a circle is included in the tolerance zone of SmartPick cursor, SmartPick snaps at the center of this circle. The point-to-point coincidence symbol appears once the circle center is picked and the circle is highlighted. For this, you can also use the Concentric command from the contextual menu on the circle.
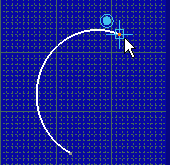
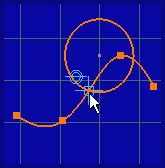
SmartPicking All Over a Curve
When a curve is included in the tolerance zone of SmartPick cursor, SmartPick automatically snaps to the curve which is then highlighted. The curve coincidence symbol appears as you go all over the curve with the cursor. This symbol means the point is snapped and that there is still one degree of freedom left, except when two curves are detected at the same time.
This is also true in the case of curves that can be extrapolated, (segments, arcs of circles, re-limited splines or conic curves). SmartPick will snap to these curves on the condition they are included in the tolerance zone of SmartPick cursor.
For this, select the Support lines and circles option (see SmartPick options in the Customizing section of this guide).
-
Go over the element to be made coincident. For example, a line.
-
Press and hold down the Ctrl key.
SmartPick cursor remains positioned on the picked element.
-
Move the cursor wherever you want.
For more details on the Ctrl key, see Creating Geometry Using SmartPick.
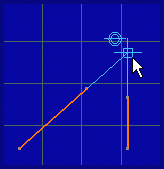
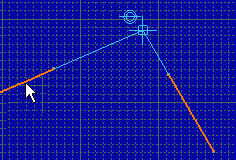
SmartPicking At the Intersection Point of Two Curves
When the intersection point of two curves is included in the tolerance zone of SmartPick cursor, both curve-type elements are highlighted. The coincidence symbol appears and SmartPick cursor snaps to the intersection.
-
Go over the element to be made coincident. For example, a line.
The coincidence symbol appears to indicate that SmartPick snaps over the line.
-
Press the Ctrl key.
SmartPick automatically remains snapped whatever the position you assign to the cursor.

-
As you press the Ctrl key, go over the second element to be intersected with the element already picked using the cursor.
When SmartPick detects that the second line can possibly be snapped to, SmartPick tries to combine both snappings detected thanks to the Ctrl key. In this particular case, SmartPick snaps at the intersection of both lines.
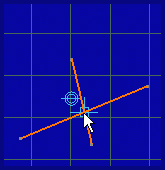
On Fictitious Perpendicular Line Through Line End Point
If the tolerance zone of SmartPick cursor goes over a fictitious perpendicular line that goes through the extremity point of a line, SmartPick snaps in order to remain on this fictitious perpendicular line.
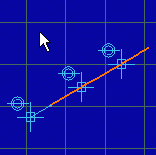
Make sure you selected the Alignment option (see SmartPick options in the Customizing section of this guide). You will thus automatically detect the different elements along which the sketch is aligned.
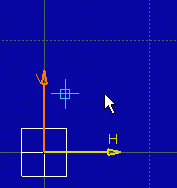
SmartPicking At a Vertical/Horizontal Position
If the tolerance zone of SmartPick cursor crosses a fictitious horizontal line that would go through a point, SmartPick snaps in order to remain horizontal to this point.
