Open the GEAR-REDUCER.CATDrawing document.
-
Click Text Template Placement
") in the Annotations toolbar.
in the Annotations toolbar. -
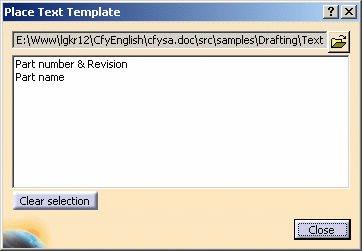
In the Place Text Template dialog box, browse to select the TextTemplates.catalog document. This document is located in your documentation installation folder (by default, this folder is C:\Program Files\Dassault Systemes\XXXdoc\online\), in cfysm_C2\samples\Drafting. Leave the Place Text Template dialog box open to perform the next steps.
-
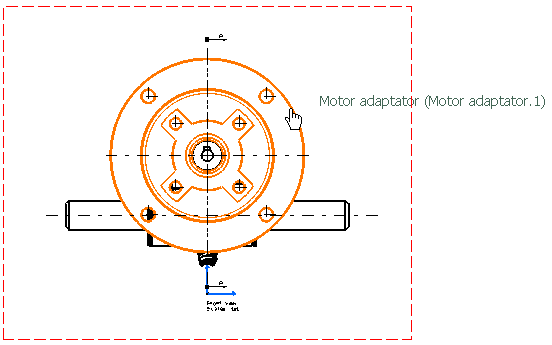
On any view, select the part that you want to annotate, making sure that you click where you want the anchor point of the annotation to be located. Note that the name of a part is displayed as a help as you fly the cursor over it.
The Place Text Template dialog box now lists all the templates available in the selected catalog and which can be applied to the selected object.
-
In the Place Text Template dialog box, select the text template that you want to apply, Part number & Revision for example. The annotation is created at the point you clicked when selecting the part to annotate, and contains information retrieved from the 3D part. Note that this annotation is associative to the 3D part.
-
If you want, select the other text template (Part name). Note that this annotation will also be created at the point you clicked, so it will overlap the first annotation. For better results, you will have to move it afterwards.
-
Repeat steps 3 to 5 for other parts that you want to annotate.

Note that the last template you selected in the Place Text Template dialog box remains active when annotating other parts. You can de-activate it by clicking the Clear selection button. 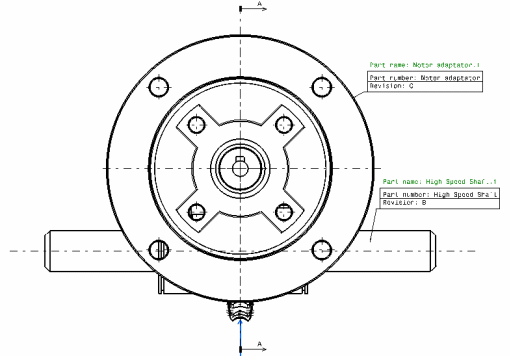
-
When you are done, click Close to close the Place Text Template dialog box.
![]()