You can create the following types of driving dimensions:
- length
- distance (and distance offset in the case of two concentric circles)
- angle
- radius
- diameter.
Make sure the Dimensions driving 2D geometry check box is selected, and identify the color that will be assigned to driving dimensions (you can change it if you want).
![]()
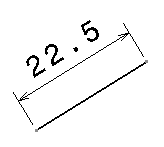
Create a line. Click the Dimensions
![]() icon from the Dimensioning toolbar and
create a length dimension on this line.
icon from the Dimensioning toolbar and
create a length dimension on this line.
-
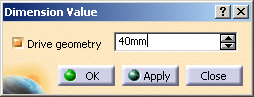
Double-click the dimension. The Dimension value dialog box is displayed.
-
Make sure the Drive geometry check box is selected. This dimension will now drive the geometry.
-
Modify the dimension value, entering 40 millimeter as the new length.
-
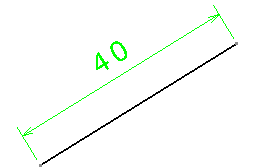
Click OK to validate and exit the dialog box. The geometry is updated according to the new driving dimension value.
")
-
Click elsewhere in the drawing to deselect the dimension. You can see that the driving dimension is assigned the colors defined in the Types and colors dialog box.
Limitations
- Between an interactive element and a generated circle center.
To bypass this problem, create a point that is concentric with the center of the circle and create the dimension between this new point and the other element. - Between an interactive circle and a generated circle.
- Between an interactive line and a generated one that are not
parallel.
To bypass this problem, create a point that will be coincident with line A and line B at the same time and create the dimension between this new point and the other element.
- Between two fixed elements, that is to say:
- generated elements
- axis lines
- center lines
- 2D components
- interactive elements that are fixed by constraints or driving dimensions.
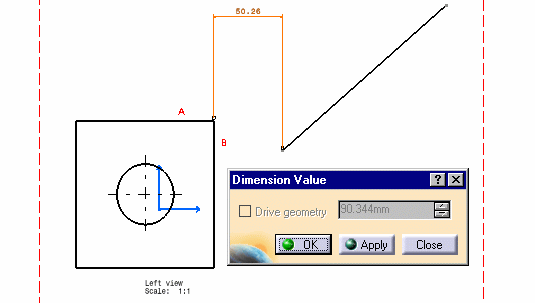
- If created using Force Dimension on element
") , a
distance offset dimension (i.e. a distance dimension created between two concentric circles) cannot drive geometry.
, a
distance offset dimension (i.e. a distance dimension created between two concentric circles) cannot drive geometry.
To bypass this problem, force an horizontal or vertical dimension. See the example below:Created with Force Dimension on element
,
distance offset dimension cannot drive geometry.Created with Force horizontal dimension in view 
or Force vertical dimension in view ,
,
distance offset dimension can drive geometry.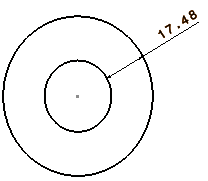

- Once the Drive geometry check box is selected, you can access a contextual menu and customize the values properties according to your needs. For more information on the available options, refer to CATIA Knowledgeware Infrastructure - Tips and Techniques - Summary, available from the Using Knowledgeware Capabilities section in the Infrastructure User's Guide.
- When a driving dimension is created between two parallel lines, then their parallelism is constrained. Therefore, if a geometrical parallelism constraint was previously applied to them, this constraint is destroyed. This avoids an overconstrained situation.