- Length dimensions
- Distance dimensions
- Radius dimensions
- Diameter dimensions
- Angle dimensions
-
Select the dimensions to be lined-up.

When selecting the dimensions, make sure that they belong to a single, coherent system (if you select dimensions which could form two different systems, you could get unexpected results). -
Right-click and select Line-up, or select Tools > Positioning > Line-up from the menu bar or
click Line-Up .
. -
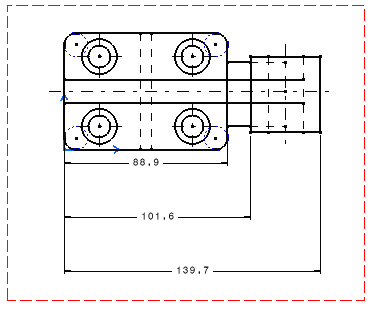
Select the element that will be used as reference for positioning dimensions, as show here:

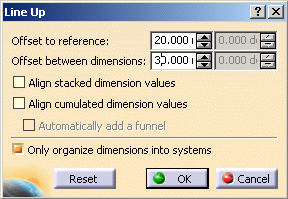
The Line Up dialog box appears.
-
Enter the desired value for the offset to reference. For example, 20 mm.
-
Enter the desired value for the offset between dimensions. For example, 30 mm.


Two fields are available for both these options: the first field is dedicated to length, distance and angle dimensions and the second field (grayed out in our example) is dedicated to radius and diameter dimensions. Whether a field is active depends on the type of dimension selected. -
Optionally, select Align stacked dimension values to align all the values of a group of stacked dimensions on the value of the smallest dimension of the group.
-
Optionally, select Align cumulated dimension values to align all the values of a group of cumulated dimensions on the value of the smallest dimension of the group.
-
Make sure the Only organize into systems option is not selected.
-
Click OK to validate.
The smallest dimension is positioned with an offset of 20 mm according to the selected element. The offset between each dimension is equal to 30mm.

![]()