- Length dimensions
- Distance dimensions
- Radius dimensions
- Diameter dimensions
- Angle dimensions
-
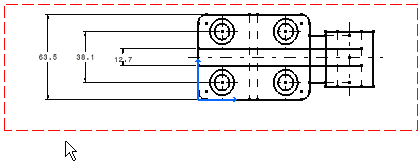
Select the dimensions to be lined up.

When selecting the dimensions, make sure that they belong to a single, coherent system (if you select dimensions which could form two different systems, you could get unexpected results). -
Do either of the following:
-
Right click and select Line-up from the contextual menu,
-
click Line-Up
 ,
, -
select Tools > Positioning > Line-up from the menu bar.
-
-
Click anywhere on the drawing.

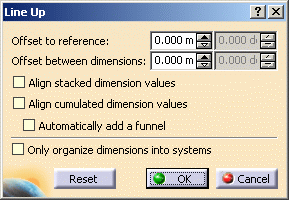
The Line Up dialog box appears.
-
Enter the desired value for the offset to reference. For example, 20 mm.
-
Enter the desired value for the offset between dimensions. For example, 20 mm.

Two fields are available for both these options: the first field is dedicated to length, distance and angle dimensions and the second field (grayed out in our example) is dedicated to radius and diameter dimensions. Whether a field is active depends on the type of dimension selected. -
Select Align stacked dimension values to align all the values of a group of stacked dimensions on the value of the smallest dimension of the group.
Note that, in the case of cumulated dimensions, Align cumulated dimension values would align all the values of a group of cumulated dimensions on the value of the smallest dimension of the group. -
Optionally, select Automatically add a funnel to display a funnel automatically whenever the dimension value cannot be displayed correctly.
-
Click the Only organize into systems option: neither the smallest dimension of each system nor dimensions that cannot be organized into systems will be moved.
-
Click OK to validate.
The dimensions are now aligned. The position of the smallest system dimension is not modified. The stacked dimensions are aligned according to the smallest dimension.


When you click in the free space, the linear offset between the smallest dimension and the reference is automatically set to 0 value. The space between two dimensions will be the space defined in the Options dialog box (Tools > Options > Mechanical Design > Drafting> Dimension tab, Line Up paragraph). See Dimension Creation in the Customizing chapter for more details.
![]()
