- This is a dynamic, graphic analysis that creates no persistent data.
- With the exception of Fly Analysis, click Apply to take any change you make in the dialog box into account.
- The input is a set of surfaces.
- The analysis identifies zones on the analyzed surfaces where the deviation from the pulling direction at any point, corresponds to specified values (Draft Angle Ranges). These zones are displayed in the color specified for each value.
Open FirstMoldedPart.CATPart in the samples directory.
-
Select the surfaces and click Pulling Direction Analysis
 in the
Analysis toolbar.
in the
Analysis toolbar.
The dialog box Pulling Direction Analysis is displayed.
A Reference Direction is proposed and a first analysis is performed: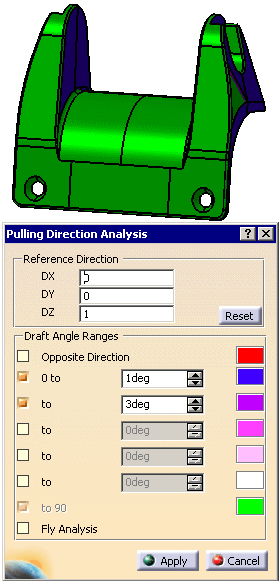
The Reference Direction is initialized as follows: - if you placed the compass on the set of surfaces to analyze, the dialog box proposes the direction of the compass,
- if you did not place the compass on the set of surfaces, and if a main pulling direction exists, the dialog box proposes this main pulling direction as the Reference Direction.
- if you did not place the compass on the set of surfaces, and if no main pulling direction exists, the Reference Direction proposed is 0,0,1.
You can type a new Reference Direction, or change it using the compass.
Click Reset to return to the initial value. -
Select as many Draft Angle Ranges check boxes as required.
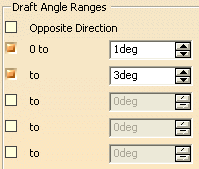
Type the value of each range, or use the arrows to modify it.
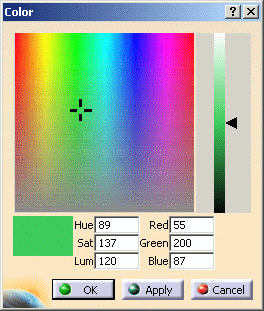
Double-click a color to change it via the color editor
-
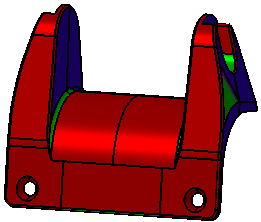
Select the Opposite Direction check box if you want to visualize the zones that should be unmolded in the opposite direction.
The image below shows the same analysis as above, with Opposite Direction selected. Those zones are displayed in red, as initialized in the dialog box.
-
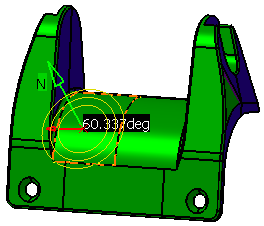
Select the Fly Analysis check box to display the normal to the face and the angle value between the pulling direction and the normal when you move the mouse pointer over the surface.
-
Click Cancel to exit the dialog box.
![]()