- When a sub-assembly is flexible, you can apply updates to it, move it when constrained and set constraints to it.
- When a sub-assembly containing an Assembly Feature, an Assembly Symmetry or a Reuse Part Design Pattern is flexible, these features cannot be updated because the flexible mechanism is not compatible with them.
- What you need to keep in mind is that rigid sub-assemblies are always
synchronous with the original product, whatever mechanical modification
you perform.
Flexible sub-assemblies' components can be moved individually in the parent assembly, without considering the position in the original product. Flexible sub-assemblies are not meant to be moved. Only their components can be moved in the parent assembly. Assembly Move commands, therefore, do not apply to flexible sub-assemblies. They either refuse flexible sub-assemblies selection (for example, Manipulate command) or move flexible sub-assemblies' components instead (for example, Move by Compass).
Since Release 7, you can edit the constraints defined for flexible sub-assemblies. The changes made to these constraints do not affect the constraints defined for the original product contained in the reference document. - You can edit the following attributes:
- values
- orientation
- driving/driven properties
- Set of constraints in a rigid sub-assembly can be removed when you make it flexible.
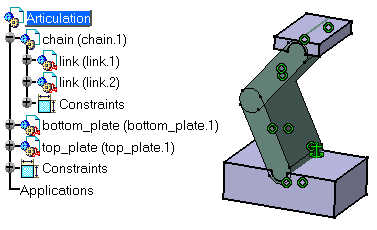
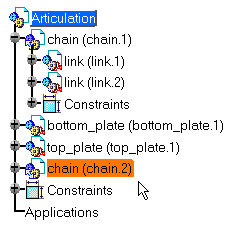
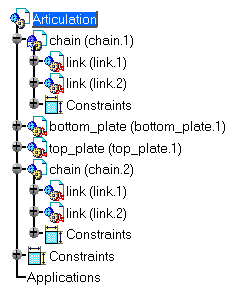
The product Articulation includes one CATProduct and two CATPart documents as follows:
-
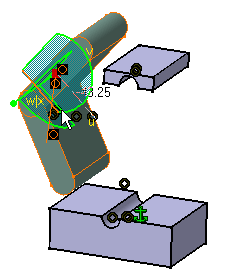
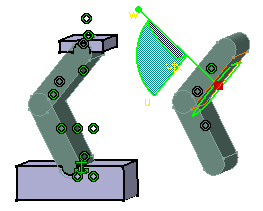
Drag and drop the compass onto link (link.1), then select link (link.1) and drag it. The whole chain -and not link.1 only- is moved.
-
Undo this action to return to the initial state.
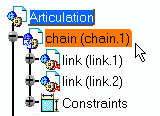
You can notice that the little wheel to the left corner of the chain icon has turned purple. This identifies a flexible sub-assembly.
-
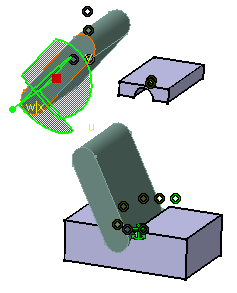
You can now move link (link.1) independently from link (link.2). For example drag and drop the compass onto link (link.1) and move it in the direction of your choice.
-
Copy and paste chain (chain.1) within Articulation.CATProduct. You can notice that the property "flexible" is copied too.
-
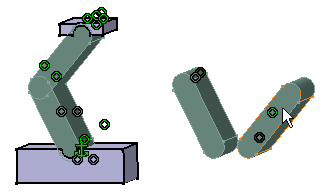
In chain.CATProduct, move link (link.1) using the compass.
You can notice that because chain (chain.2) is rigid, it inherits the new position of the original chain.CATProduct. Conversely, chain (chain.1) remains unchanged.
What you need to keep in mind is that rigid
sub-assemblies are always synchronous with the original product, whatever
mechanical modification you perform.
Flexible sub-assemblies can be moved individually, without considering the
position in the original product.
Since Release 7, you can edit the constraints defined for flexible
sub-assemblies. The changes made to these constraints do not affect the
constraints defined for the original product contained in the reference
document.
You can edit the following attributes:
-
values
-
orientation
-
driving/driven properties
-
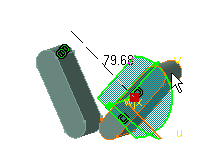
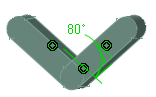
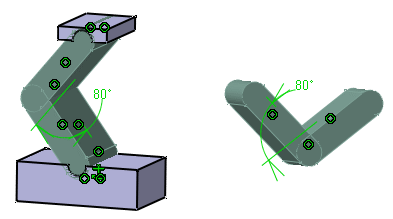
Set an angular constraint between Link 1 and Link 2 in chain.CATProduct. For example, set 80 as the angle value.
You can notice that both instances, chain (chain.2) and chain (chain.1) inherit this constraint.
-
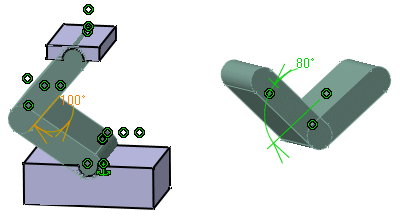
Edit the value of the angle constraint for chain (chain.1). Enter 100 for example. This new value is specific to chain (chain.1). Because chain (chain.1) is a flexible sub-assembly, this value can no longer be affected by changes to the value set in the reference document.
-
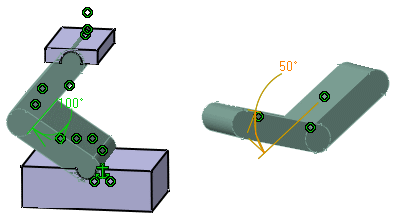
Edit the value of the angle constraint set in chain.CATProduct. For example, enter 50 as the new value: because chain (chain.2) is a rigid sub-assembly, and as the constraint value for chain (chain.1) has been already redefined, chain (chain.2) is the only sub-assembly to inherit this new value.
Mechanical Structure
In Mechanical Structure Tree dialog box, chain.2 is displayed because it is a rigid sub-assembly. Conversely, chain.1 is not displayed since it is a flexible sub-assembly.
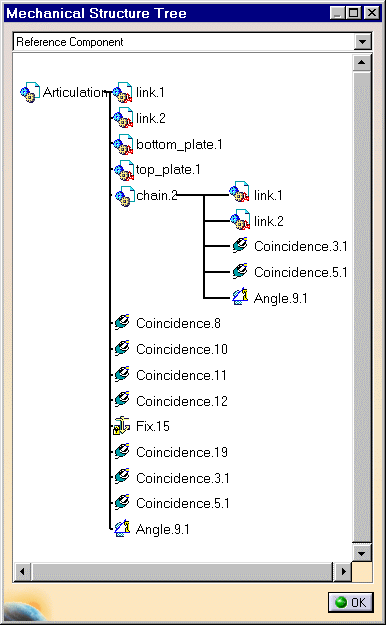
This display is merely informative. Note that you can use the Reframe graph contextual command and the zoom capability to improve the visualization, but also the Print whole contextual command to obtain a paper document. For information on printing, please refer to Printing Documents.