-
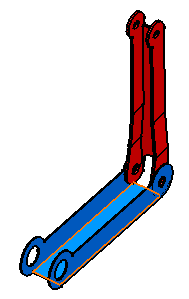
Select the face to be constrained, that is the blue face as shown.
-
Select the second face to be constrained, that is the red face in the same direction of the blue face.
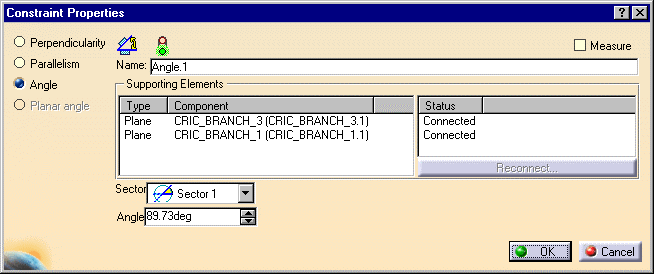
The Constraint Properties dialog box is displayed with the properties of the selected constraint and the list of available constraints:
-
Perpendicularity
-
Parallelism (you then need to define the orientation of the faces. You can choose between Undefined, Same, Opposite options)
-
Angle
-
Planar angle (an axis is to be selected. This axis must belong to both planes)
Note that when changing a Same orientation into an Opposite orientation or vice-versa, the application may sometimes positions the parts in an unexpected way especially if your system is under-constrained.
-
Keep the Angle option.
-
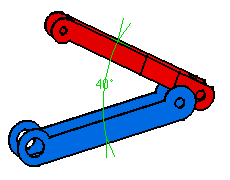
Enter 40 deg in the Angle field and keep Sector 1.
A
Sector combo box appears only when you select two geometries for
which the orientation can be defined (this rule excludes line or edge).
Four angle sectors are available:
|
-
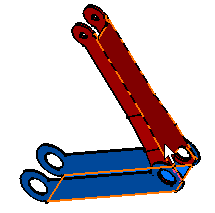
Click OK to create the angle constraint.
As the angle constraint is created, the red component is moved so as to adopt its new position. A green arrow is displayed in the geometry area to indicate that this constraint has been defined. The angle value is displayed too. This constraint is added to the specification tree too.
Graphic symbols used for constraints can be customized. For more information, refer to Customizing Constraint Appearance.