-
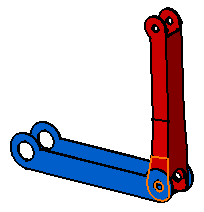
Select the face to be constrained, that is the red face as shown.
-
Select the second face to be constrained, that is the blue inner face in the direction opposite to the red face.
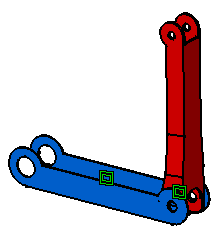
As the contact constraint is created, the red component is moved so as to adopt its new position. Green graphic symbols are displayed in the geometry area to indicate that this constraint has been defined.
This constraint is added to the specification tree too.
Graphic symbols used for constraints can be customized. For more information, refer to Customizing Constraint Appearance.