-
Select Insert > Body in a Set... from the menu bar.
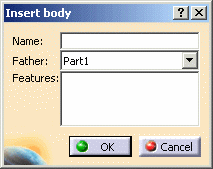
The Insert body dialog box is displayed. 
-
Enter the name of the body you wish to insert into the ordered geometrical set. Our part contains no bodies, so enter a name as you are creating the body. For example, enter New Body.
-
Use the Father drop-down list to choose the body where the new ordered geometrical set is to be inserted. In our example, set Ordered Geometrical Set.1. All destinations present in the document are listed allowing you to select one to be the father without scanning the specification tree. They can be:
-
ordered geometrical sets
-
parts
By default the destination is the father of the current object. By default the body is created after the current feature. -
-
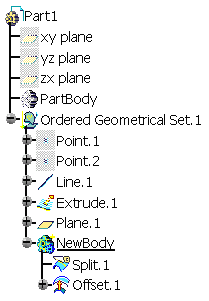
It is possible to select elements of the Ordered Geometrical Set to put these elements inside the body when creating it. Only consecutive elements can be selected. Volumes and bodies cannot be selected. In case of selection of elements, the destination became automatically the father of the selected elements and cannot be changed any more. Select for example, Split.1 and Offset.1.
-
Click OK to confirm the operation.
The result is immediate. 
You can now create the features you need in the new body inserted into the Ordered Geometrical Set.
![]()