you must have already performed a Main Pulling operation on it.
-
Open file FirstMoldedPart.CATPart from the samples directory and
perform a Main Pulling Direction operation on it with the default options.
-
Click Compare
 in
the Import Model toolbar.
in
the Import Model toolbar. -
Select NewVersionMoldedPart.CATPart in the samples directory,
Click so
that it becomes
so
that it becomes

(because the model we are importing is a set of faces) and click OK.
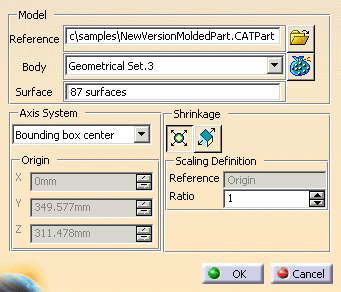
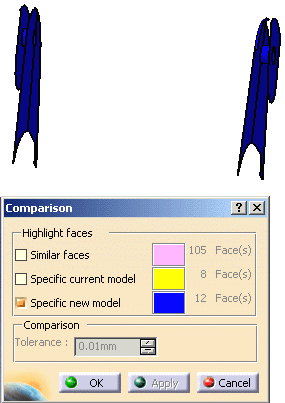
This opens another dialog box:
-
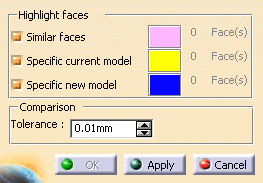
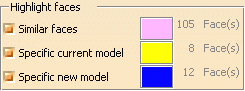
Click Apply.
-
Deselect the first two boxes
(because we only want to see the faces that have changed between the two versions of the model,
i.e. those that are specific to the new model).
-
Click OK. Two new items have been added to the tree.
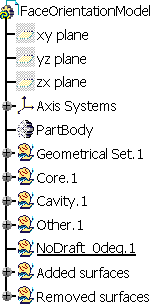
Added surfaces are the new ones that come from the new model
and they will need to be assigned to the Core, Cavity, NoDraft or Other areas.
Removed surfaces are those that have been replaced by the Added Surfaces
in the Core, Cavity, NoDraft or Other areas. -
Hide the Core, Cavity, NoDraft, Other and Removed surfaces.
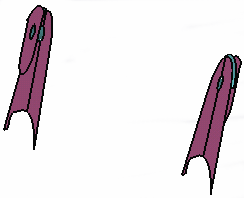
Click Pulling Direction and
select the Added surfaces.
and
select the Added surfaces.
-
The surfaces have been analyzed according to the main pulling direction already used for the first model.
Click OK to transfer them to the appropriate areas (core, cavity, etc.). -
Select the Removed surfaces in the tree and delete them.
![]()