Creating a Multi-Domain Constraint Area

This task shows you how to create a multi-domain constraint area.
aprereq.gif (1223 bytes) A multi-domain constraint area is a space reservation made up of several elements in the same body. Each multi-domain constraint area belongs to a separate body under the PartBody.
This feature is available on both the board and manufacturing panel.
aprereq.gif (1223 bytes) Open a CATProduct document, containing a board/panel.
  1. Choose the Insert > Body menu item.

  2. Select Sketcher I_SketcherP2.gif (229 bytes).

  3. Select the board/panel to define the working plane.

  4. Click Profile I_ContourP2.gif (211 bytes) and draw the multiple contour of the constraint area.

  5. Click Exit Sketcher I_CloseP2.gif (214 bytes) to return to the 3D world.

  6. Click Pad I_PadP2.gif (218 bytes).
    The Pad Definition dialog box appears.

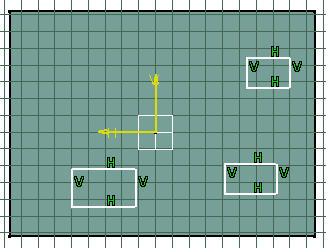
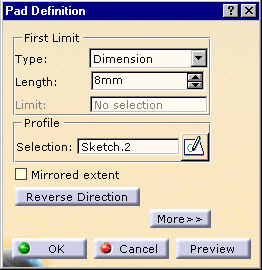
  7. Enter 8mm in Length.

  8. Click OK to validate.

  9. Select Constraint Area I_ConstraintArea.gif (969 bytes).

    The Constraint Areas dialog box opens.
    The constraint area types are:
    • Route outline: an area where routing electrical connections is allowed
    • Place outline: an area where component placing is allowed
    • Other outline: other area type defined by an outline, cutouts and a thickness
    • Via keepout: an area where via placing is forbidden
    • Place keepout: a mechanical space reservation where the component height is limited
    • Place region: an area where placing is limited to component of certain types
    • Route keepout: an area where routing electrical connections is forbidden
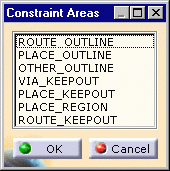
  1. Choose the type and click OK.

The multi-domain constrain area is displayed in transparency.

The pads are more than simple pads: they have technological properties.