Open the Scenario3.idf file and the corresponding
Scenario3.lib file from the samples folder.
An Assembly Product document is generated.
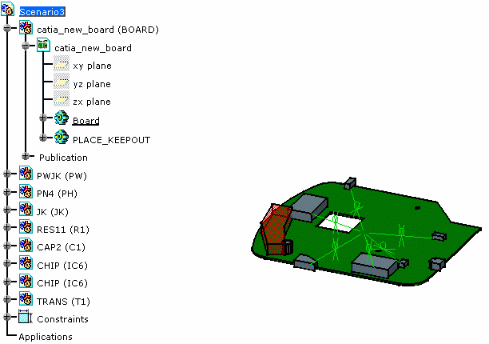 |
If the configuration you are using provides access to the
Assembly Design workbench, geometrical
constraints are created between the board and the components, and are
displayed.
Within the assembly, the board needs to be anchored.
-
Double-click the power-jack constraint shown here in red.
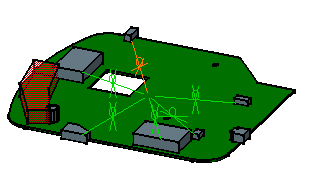
The Constraint Definition dialog box opens. 

The Assembly constraints (geometrical constraints) linking the components to the board depend on the component status.
Component Status Assembly Constraint Unplaced No Constraint Placed Plane to Plane Constraint Fixed Fixity Constraint This information is transmitted through the import file (.idf), the component capability to change location is then driven by the constraint. Under certain circumstances, a component status can be modified:
- from unplaced to placed or fixed
- from placed to fixed
but never from fixed to placed or unplaced, nor from placed to unplaced (in order to keep the information defined in the ECAD world).
-
Editing the constraint, using the More >> button, lets you modify the offset between the component and the board (IDF 3.0):
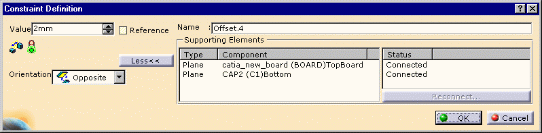
The IDF 3.0 takes into account the offset which represents a mounting constraint of the component onto the board. The offset is also managed between the board and the panel.