 |
-
Open a document in your Version 5 session.
-
Select File > Document Properties.
|
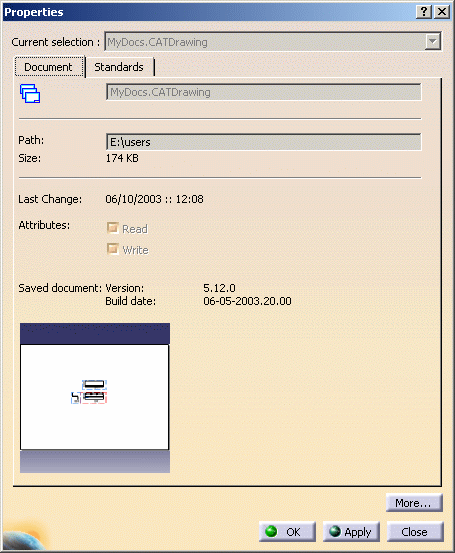
The Properties dialog box opens: |
 |
The following information is
displayed under the Document tab:
- Name of the document along with a symbol identifying the
document type (a CATDrawing in our example)
- Path: folder in which the document is saved
- Size: size of the document are indicated
- Last Change: date and time of the last modifications
- Attributes: indicates if the document is read-only or not.
In addition to this, the version and release number (including
Service Pack number, if applicable) and the build date of the
code level used for the last document save are displayed.
Note that no version and build date information are displayed:
- if the document has never been saved (i.e. a new document)
or if it has been saved prior to V5R10
- if the document is not a Version 5 document (for instance,
a V4 model
document).
|
 |
Some applications do
not display all the properties available when the Properties
dialog box is first displayed. In this case, click More...
to access other tabs: a progress bar appears and you can either
wait until more properties are displayed or interrupt the command
by clicking Cancel.
If interrupted, the Properties dialog box returns to
its original state, i.e. as if More.... had not been
clicked.
In both cases (interruption or not), More... then
disappears. |
-
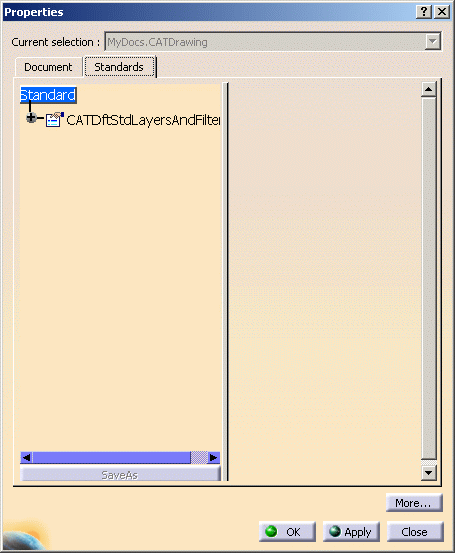
Click the Standards tab to
display the standards (if any) that have been defined for the
documents.
| Standards are defined by your administrator in
XML (Extensible Markup Language) files and let you set default
values for element properties. In our example, we display the
standards applied to a .CATDrawing document and stored in
CATDftStdLayerAndFilter.xml: |
 |
-
Click the + sign next to the desired node to display
the corresponding structure.
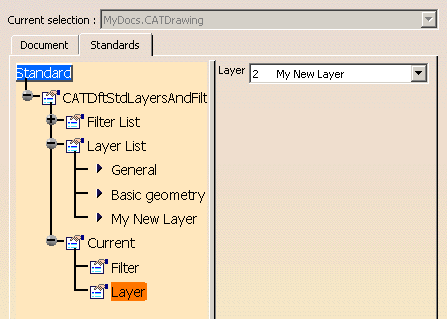
In our example, we want to learn more about the current layer applied
to the document:
 |
| As you can see in the above capture, the current
layer applied to the document is a new layer named "My New
Layer". If you need to customize some of these parameters, you
can make your modifications directly in the Standards tab or
using an XML editor, provided that you are logged as
administrator.
For detailed information on customizing standards for layers
and filters, refer to Customizing
Standards for Layers and Filters in this guide.
For detailed information on customizing drafting and generative
standards (ANSI.xml, ISO.xml, etc.), refer to "Standards
Administration" in the Version 5 - Interactive
Drafting User's Guide. |
-
When finished, click OK to close the dialog
box.
|


