-
Select Start > Infrastructure > Feature
Dictionary Editor then click Open User Dictionary
 .
The Open User Dictionary dialog box opens:
-
Navigate to the directory where your .CATfct files are
stored. In our scenario, we use the
CATStrFunctionalDesignSample.CATFct dictionary stored in ..
OS_a\resources\graphic.
-
Click Open.
-
Double-click a class, e.g. Deck, then click Define
Color
 :
:
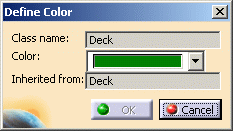 |
| The name of the class you selected is displayed in
the Class name box (where you see "Deck"). This means
that the color you are going to choose will be assigned to all
objects of this class when placing them in your structure design
using the Structure Functional Design workbench. The
Inherited from box indicates from which parent class the
current class (i.e. "Deck") inherits its color. In our example, the
class name and the parent class are the same, which means that the
"Deck" class does NOT inherit its color from any parent class. |
-
Click the black arrow next to Color then
select a color from the list:
-
To access more colors, or to create your own colors,
click More Colors... at the bottom of the list to access the
color palette:
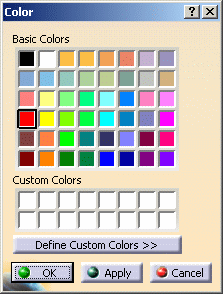 |
| In the Basic Colors area, the first sixteen colors
(in the top two rows) are the same as those in the previous list.
The remaining four rows contain extra colors. The Custom Colors
area contains sixteen free boxes in which you can place your custom
colors. |
-
Click the Define Custom Colors >> button to
display the full color palette and color customization tools then click
one of the free boxes in the Custom Colors area:
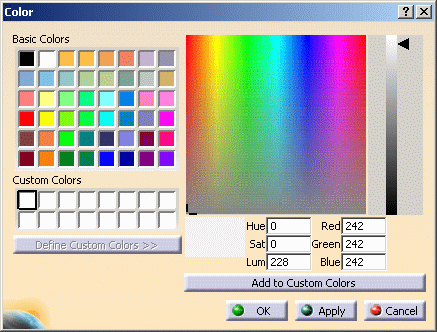 |
| The colored area with the cross represents a color
spectrum. Drag the cross inside the spectrum to instantaneously
change the color in the small box below the spectrum.
The HSL (Hue, Saturation and Luminance) and RGB (Red, Green and
Blue) values vary according to where the cross is located. You can
also enter HSL and RGB values in the fields provided to suit your
exact color specifications.
Move the arrow up or down to vary the brightness of the custom
color. |
-
Once you are happy with the color, click the Add to
Custom Colors button to add the custom color:
-
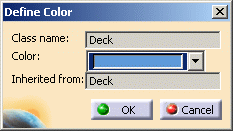
Click on the custom color, then
OK.
| The color is now displayed in the Color
box of the Define Color dialog box: |
 |
-
Click OK to save the new color.
|
In our scenario, the following two XML files stored
in ...OS_a\startup\EquipmentAnd
Systems\StrFunctionalDesign\DataDictionary\
have been modified:
|
The RGB values of the new default color are stored in
clr-DeckPanel.xml and setting "Dark Green" as the default
color has made the file content change from this:
<?xml version='1.0' ?>
<!DOCTYPE Doct SYSTEM "schemacolor.dtd">
<Doct><schema_Color seq_RED = "211" seq_BLUE = "125" seq_GREEN =
"178"/></Doct>
to this:
<?xml version='1.0' ?>
<!DOCTYPE Doct SYSTEM "schemacolor.dtd">
<Doct><schema_Color seq_RED = "0" seq_BLUE = "0" seq_GREEN =
"128"/></Doct> |
|
You are now ready to apply a unique color to all
your Structure Functional Design classes. |
-
Close the Feature Dictionary Editor workbench
then enter the Structure Functional Design workbench by
selecting Start > Equipment & Systems > Structure Functional Design.
-
Place the object (i.e. "Deck" in our example) in your
design. You can see that its color is the one you setup via the
Define Color command detailed above:
-
Now, right-click the Deck object then select
Properties to access the graphic properties of the object.
-
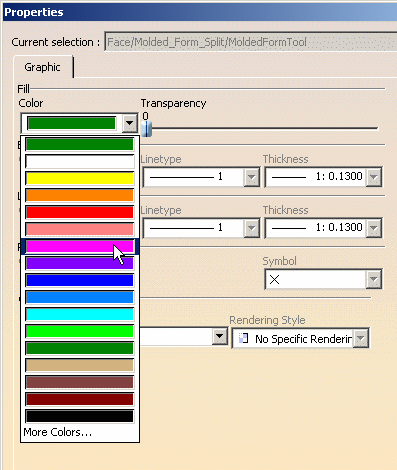
Select another color in the Color list then
click OK to validate.
 |
|
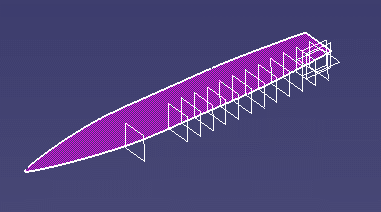
The object is now displayed in a color other than
the default one: |
 |
-
To reset the object to the default color you defined in
the steps above, right-click the object then select Reset color.