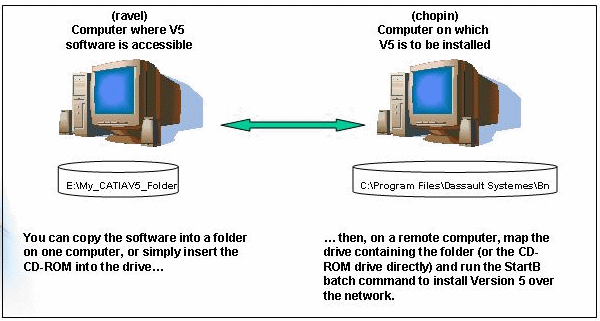
You can copy the software into a folder on the source computer, or simply insert the Version 5 CD-ROM into the drive. Then, you can log onto another computer, the client, on which you want to install Version 5, map the drive containing the folder (or the CD-ROM drive directly) and run the StartB batch command to install Version 5 over the network, as illustrated below:

Note that the default installation path can be:
     C:\Program Files\Dassault Systemes\B18
     (Windows XP Pro)

     C:\Program Files\Dassault Systemes\B18 (64-bit code on Windows XP
     Professional x64 Edition)

     C:\Program Files (x86)\Dassault Systemes\B18 (32-bit code on Windows XP
     Professional x64 Edition)
- copy all the software into the same folder (as illustrated above)
- or, given that the software is distributed on several CDs ( 1, 2 ...), copy the contents of each CD into a separate folder for each CD, making sure that the name of each folder corresponds to the CD number ( 1, 2 ...) etc.
One way of preventing the installation procedure from starting automatically after inserting the CD-ROM is to press and hold down the Shift key immediately after inserting the CD-ROM.
You must belong to the Administrators group, or have the privileges assigned to the Administrators group.
You need to use the Explorer to connect over the network to the computer containing the software, and access the StartB batch program in the folder
The Map Network Drive dialog box is displayed:

\\Remote_Computer\My_CATIAV5_Folder) or directly the CD-ROM drive,
or use the Browse... button to navigate, then click the Finish
button once you have made your selection.Note that if you browsed to select the folder, its name will be displayed like this in the Folder field:
\\Remote_Computer\My_CATIAV5_Folder
Once mapped, the connection to the remote computer in the Explorer window will look like this:
My_CATIAV5_Folder on 'Remote_Computer' (L:)
StartB -h
to display help if you are not familiar with the StartB
command.
For example, running the following command will install the DP2 and MD2 configurations (and the corresponding nodelock licenses) for the CATIA product line into the following location, for example on 32-bit Windows XP Pro:
StartB -u "C:\Program Files\Dassault Systemes\B18" -newdir -l
     "DP2.slt MD2.slt" -lic E:\CATIAV5_Licenses\MYCONFIG.LIC
StartB command, refer
to Installing in Batch Mode
![]()