By ENOVIA product we mean:
- Webtop application: ENOVIA VPM Lifecycle Navigator
- Wintop applications: the ENOVIA VPM Product Editor (VPC product), 3d com Classic, the VPM Navigator client.
Customizing Login Attempts
You can customize the number of login attempts authorized.
The system allows a maximum of 7 login attempts for security purposes. Once the user inputs the wrong password, for example, more than seven times, the server manager will not allow the user to log in again.
Use the environment variable:
CATSrvLoginMaxAttempt
to specify a new number of login attempts. You can set this in the
runServerManager shell (UNIX) or using the Environment
Variables button in the Advanced tab of the System
control accessed using the Control Panel (Windows). Example
(UNIX):
export CATSrvLoginMaxAttempt = 14
When the maximum number of attempts is reached, the user is blocked for a length of time. You can customize this time using the environment variable:
CATSrvLoginTimeCheck
to specify the wait time in seconds. Example (UNIX):
export CATSrvLoginTimeCheck = 3600
Starting Webtop Products
Webtop products are started by opening a web browser and entering a URL to load a html page hosted by a server. Keep in mind that the sequence of steps for starting your Webtop product differs depending on:
- whether you are using an LDAP server or not
- whether you activated SSO or not.
Furthermore, when you are starting ENOVIA VPM Lifecycle Navigator, you first load the appropriate html page and then you have to choose a minimum number settings before being able to connect to the desired data source.
Starting ENOVIA VPM Lifecycle Navigator
- Stop and restart the WAS, and your LDAP server if you are using LDAP.
- Make sure that the Orbix daemon is running.
- In a web browser, type the following
URL:
http:<host_name>.<domain>:<webapp_port>/<rootURI>/html/ENOVIAPortalExample:
http://loug3dsy.dsy.ds:9080/B18/html/ENOVIAPortalIf a dialog box like this is displayed:
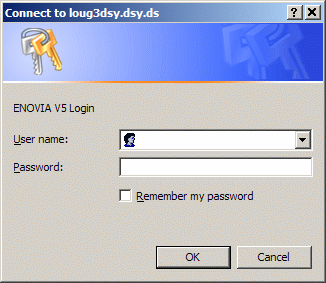
this demonstrates that LDAP authentication is being requested.
Then, the ENOVIA Portal window is displayed like this:
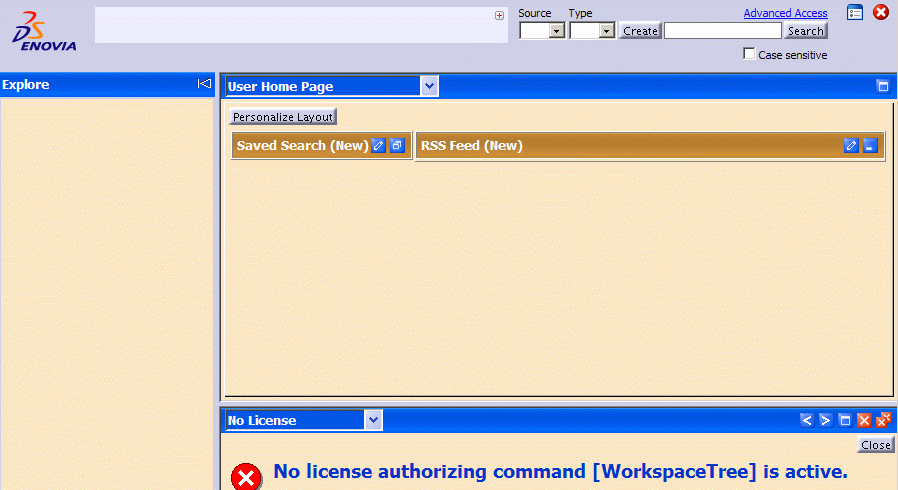
The message:
No license authorizing command [WorkspaceTree] is activemeans that you must first acquire a license.
At this stage, there are several settings that you can specify. For the purposes of this deployment scenario, we will describe how to acquire licenses and connect to the ENOVIA V5 VPM server to get you started.
- Click the Administrative and Preferences button
 in the Main Access area. The Administration window
appears:
- Expand the Administration folder:
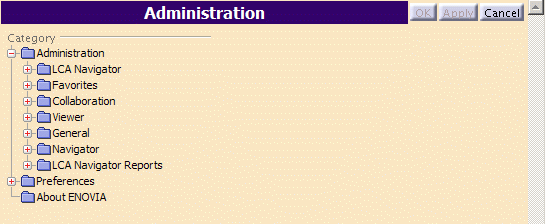
- In the Administration page, click the General
folder, then the License Group icon:
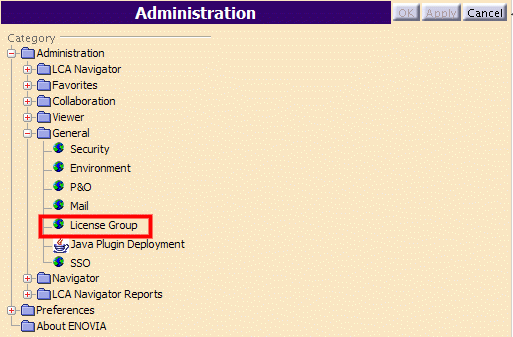
to display the License Group tab:
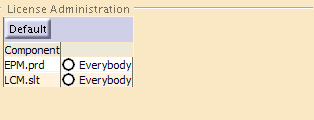
which lists the software configurations/products installed. In our example, the EPM and LCM configurations were installed. Note that in our example, no groups are visible: group licensing has not been implemented.
- Check the Everybody option opposite both licenses (if
you want to use both licenses):

- Click the Apply button.
You are now ready to connect to the ENOVIA V5 VPM server.
- Expand the Navigator folder, then click on the Adapters icon:
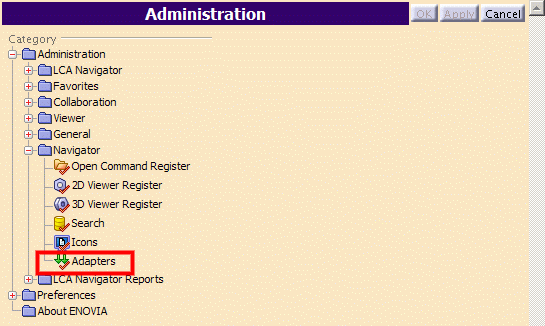
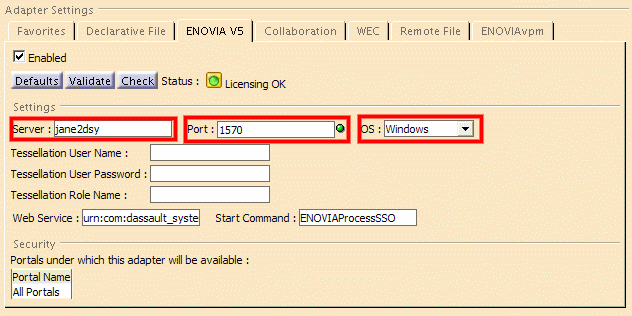
- Select the ENOVIA V5 tab:
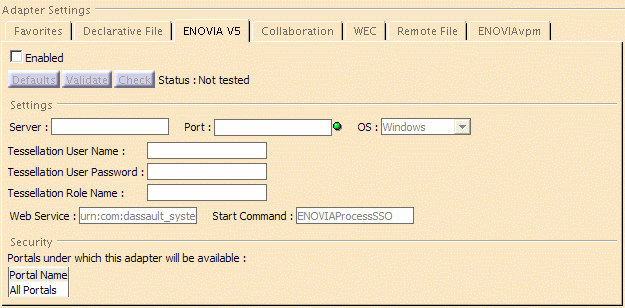
- Check the Enabled option and set the Server,
Port and OS:
- Server: name of the machine hosting the ENOVIA V5 VPM server
- Port: server port number
- OS: operating system running on the server (Windows or UNIX).
Then click the Validate and Check buttons:
- Click the Apply button.
- Exit and reload the the URL and log on again.
This time, the page looks like this:

- In the Source list, select ENOVIA V5.
Method 1: SSO Mode Is Not Activated
If the SSO mode is not activated, the following dialog box appears prompting you to log on to ENOVIA V5 VPM:
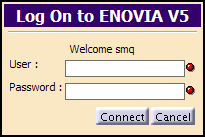
This userid:
- is used to start the ENOVIA V5 VPM server process
- must have the appropriate rights to start this process
- and does not necessarily have to be the same userid as is declared in your user repository (LDAP, ...).
This userid is typically root on UNIX and must be an administrator userid on Windows.
Enter the user and password, then click the Connect button.
If not, you will not be able to connect to ENOVIA V5 VPM. If you succeed in logging in, the following dialog box appears:
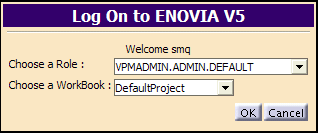
prompting you to choose a role and workbook. You will only be able to proceed if your userid is also declared in the People and Organization (P&O) database.
In a properly defined working deployment, you typically want the P&O username to be the creator of ENOVIA V5 VPM objects, and you also want the P&O username to match the SSO username declared in your user registry (LDAP directory, ...) to avoid confusion.
Click OK to proceed.
Method 2: SSO Mode Is Activated
Neither of the previous two dialog boxes appears because logging on with LDAP authentication retrieves the credential set providing all credentials required to access the ENOVIA V5 VPM server.
In Both Cases
The main access are now looks like this:
You are now connected to the ENOVIA V5 VPM server and can start creating ENOVIA objects.
What About the Other Administration Settings?
For a description of the other settings, please refer to "Performing Administration" in your ENOVIA VPM Lifecycle Navigator Users Guide.
Starting Wintop Products
Starting the ENOVIA Client on Windows
- Double-click the
ENOVIA V5 VPM
V5R18 icon on the desktop to start the ENOVIA client:
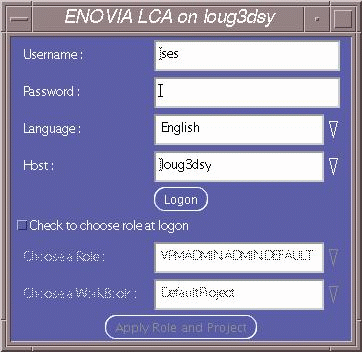
The following logon panel appears:
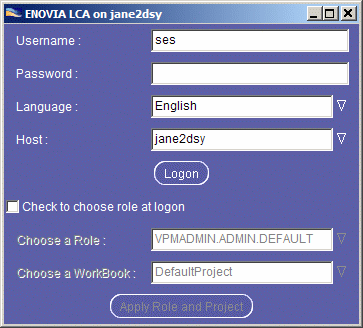
The Logon window title reads:
ENOVIA V5 VPM on <server_name>:<port_number>
- Enter the name and password of the
ENOVIA V5 VPM administrator created
during the installation.
During the installation illustrated in this guide, the ENOVIA V5 VPM administrator userid was "ses", so we can only log on to the ENOVIA Portal using this userid.
This is the only userid allowing you to log on at the end of the installation: no other userids are created at installation allowing you to do so.
- Set the Language and Host settings:
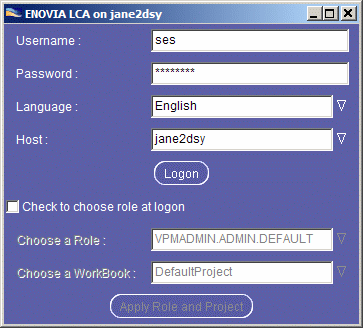
The Host is the name of the computer on which you installed the ENOVIA server.
Note: if the port number for the Orbix daemon you configured when installing the code is different from the default port number (1570) you must enter the host name as follows:
server_name:port_numberIn our example, if you configured the Orbix daemon on port number 1590, you would enter:
jane2dsy:1590
- Click the Logon button.
For the moment, ignore the "Check to choose role at logon" option: the installation sets up a default role and project.
The ENOVIA Portal window appears:
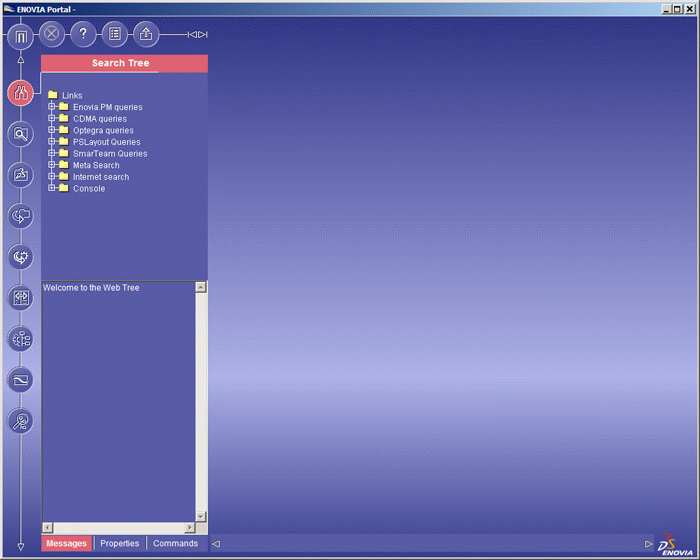
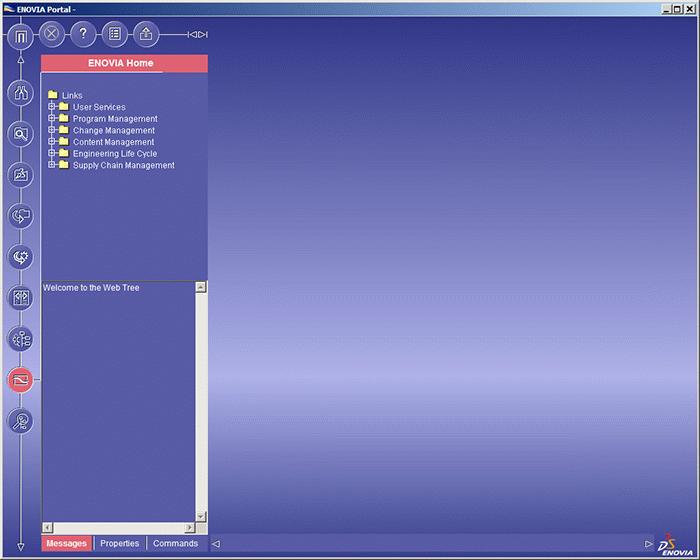
- Click the ENOVIA home button (highlighted in red) to access the
ENOVIA V5 VPM functions:
Setting Up Vault Properties files on the Client
Before using the client to store ENOVIA documents in the vault, or if you want to use ENOVIA in conjunction with CATIA V5, you must copy the following file from your ENOVIA V5 VPM server installation:
server_unload_path\OS\docs\java\VaultClient.properties
into the following client directory:
your_client_or_CATIA_unload_path\OS\docs\java
This properties file also has to be updated to reflect the port and server where the vault was installed.
Starting the ENOVIA Classic Client on UNIX
The principal command you will use is the catstart command.
This command is used to launch other programs for:
- starting a Version 5 session for your product line
- running Version 5 environment administration tools (catiaenv, setcatenv, delcatenv, lscatenv, chcatenv, readcatenv)
- running Version 5 software management tools (CATSoftwareMgt, CATNodelockMgt, CATOptionsMgt, ... and the equivalent batch commands).
To do so:
- Log on as either root or end user.
- Enter the command:
/usr/DassaultSystemes/B18/OS/code/command/catstart - direnv ~/CATEnv
       -env
       ENOVIA_V5_VPM.V5R18.B18 -run enoviastart
where "OS" is:
- aix_a
- hpux_b
- solaris_a
to start a session using the default global environment created at installation.
enoviastart Command Syntax
enoviastart [-env environment_name] [-port OrbixPortNumber] [-serv OrbixHostServer] [-servURLList Server_URL_List]
-env: environment name-port: port number-serv: Orbix host server-servURLList: references the Loadbalancing.properties file containing the server URL list (used for Portal load balancing)-h: help.You can also run the command by changing to the directory:
/usr/DassaultSystemes/B18/OS/code/command/If you do so, run the command like this:
./catstart -run enoviastartOn AIX, if you attempt to start the ENOVIA VPM Product Editor with LIBPATH and LD_LIBRARY_PATH variable values exceeding 950 characters, Java runtime fails. If this occurs, reset the path to a shorter value.
After running this command, the ENOVIA V5 VPM Logon window appears:
The logon window works the same way as on Windows:
Enter your user name name and password.
Select the Language, then the Host name of the remote workstation hosting the ENOVIA server.
Click the Logon button to log on.
Setting Up Vault Properties Files on the Client
Before using the client to store ENOVIA documents in the vault, or if you want to use ENOVIA in conjunction with CATIA V5, you must copy the following file from your ENOVIA V5 VPM server installation:
your_server_unload_path/$OSDS/docs/java/VaultClient.properties
into the following client directory:
your_client_or_CATIA_unload_path/$OSDS/docs/java/
This properties file also has to be updated to reflect the port and server where the vault was installed
![]()

