 |
This task explains how to set up a
network license server, and is intended for the administrator who is
setting up an environment to allow multiple client workstations to share
licenses stored on one or more network license servers. |
|
 |
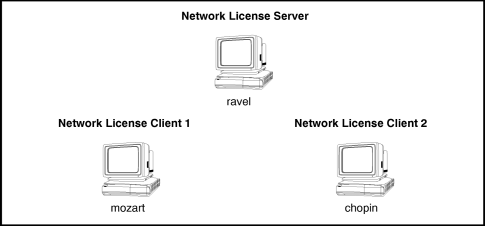
This scenario shows you how to set up a network license
server on one workstation (ravel), and the scenario
Setting Up Your Network
License Clients two network license clients on two other workstations (mozart
and chopin): |
|

|
 |
Designing the network licensing environment requires
careful thought and planning. Consequently, we strongly recommend that you
read the following sections in the manual
Using License Use Management
Runtime for your platform:
- Chapter 2 "Planning Network Licensing": note that before starting,
you must determine whether you want to use direct binding or namespace
binding. For more information about what this means, read the section
"Selecting a Type of Network Binding". For reliability reasons, we
strongly recommend that you use direct binding.
- the section "Setting Up Your Servers and Clients", in particular
"Scenario 3: Configuring a Network License Server" in the chapter
"Configuring License Use Management Runtime".
|
 |
1. Log on as root onto the workstation on which the
network license server is to be configured. In our scenario, the
workstation name is "ravel". |
|
2. Go to the LUM installation location. |
|
You configure the network license server using a
configuration tool which has, in LUM 4.5.8 on AIX and Windows XP, and in LUM 4.6.X on all platforms, a graphic user interface (GUI),
and on all UNIX platforms a script interface. |
|
3. Run the command: i4cfg
The Configuration Tool notebook is displayed. |
|
4. On the Configure As page, check the Network License Server
and Advanced Configuration options. |
|
5. On the Start up page, check the option "Start
services at system startup" if you want the configured server to start when
you power on your workstation. |
|
6. On the Log page, select the events you want to be
logged, and specify the log file directory where you want the log to be
kept. |
|
7. If you have decided to use direct binding
(strongly recommended), select the Direct Binding page, and enter in the
Name field the TCP/IP host name of the server workstation ("ravel" in our
scenario), then press the <<Add button to add the server to the Servers
list. |
|
8. Select Close from the system menu at
the top left corner of the Configuration Tool notebook, and click the Yes
button to save your changes.
On all UNIX platforms, the license server can be configured using a
script. To do so, type the command:
i4cfg -script
and in response to the first question, select 3, then answer the
questions when prompted. |
|
9. Run the command:
i4cfg -start
to start the server. |
|
10. Run the command:
i4cfg -list
to check that the server is up and running. |
|
You are now ready to enroll your licensed products and register the
licenses using the Basic License Tool.
This phase involves:
- enrolling the products and the licenses
- distributing the licenses to the network license server.
For detailed information and a scenario explaining how to enroll
licensed products and register the licenses, refer to the sections
"Performing Basic Administration", "Scenario 6: Managing a Licensed
Product", in the chapter "Administering License Use Management Runtime" in
the manual: Using License Use Management Runtime for your
platform. |
|
If you suspect that the license server database has been corrupted, we
recommend that you run the following LUM command
i4blt -C
to check and if necessary repair the license database. |
|
 |
![]()

![]()