For DB2 and Oracle databases, you must have at least 150 Megabytes of free disk space to successfully install the ENOVIA V5 tablespaces and data files. Whatever additional disk space you will need depends on the size of your database.
Setting Up a Database Using IBM DB2 Universal Database
Your computer needs to be a DB2 server.
To find out whether the DB2 software on your computer is configured as a client or a server:
- Select
Start->(All) Programs->IBM DB2->Command Line
       Tools->Command Line Processor
to open a command prompt window in the DB2 environment. - Run the command:
get dbm cfg - If a line like this appears at the top of the screen output:
Node type = Enterprise Server Edition with local and remote clients
your computer is already set up as a DB2 server. If not, install the DB2 server before proceeding.
Modifying the Stack Reserve Using the db2hdr Utility
Before proceeding, make sure the DB2 server is not running. To
check if it is already running, select Start->(Settings->)Control
Panel->Administrative Tools->Services and check that the following
DB2 services are up and running:
DB2 - DB2 - 0

     DB2 Governor

     DB2 - JDBC Applet Server
If the DB2 server is running, stop it, then make sure that there is no
db2sysc process running. Then, increase the default stack size for
the db2syscs.exe using the db2hdr utility as follows by,
for example, selecting Start->(All) Programs->IBM DB2->Command Line
Tools->Command Window, then running the following command to modify
the stack reserve:
%DB2InstallationPath%\misc\db2hdr
     %DB2InstallationPath%\bin\db2syscs.exe /s:512
You must then restart the DB2 server and create at least one database before starting the installation.
To get help for db2hdr, run the utility without arguments:
%DB2InstallationPath%\misc\db2hdr
To check the current values of the db2 stacks, run the utility with one argument (full path for db2syscs.exe):
%DB2InstallationPath%\misc\db2hdr
     %DB2InstallationPath%\bin\db2syscs.exe
Once you have modified the stack reserve, start the above-mentioned DB2 services before proceeding. You can also configure the services to make sure that they are always running. To do so, select a service then right-click and choose "Properties" on the contextual menu, then set the "Startup type" to "Automatic".
- Once your computer has been set up
as a DB2 server, log onto your Windows computer as DB2 database
administrator.
The default installation of DB2 on your computer typically sets up the DB2 database administrator with the following userid and password:
db2admin
db2admin - Select
Start->(All)
     Programs->IBM DB2->General Administration Tools->Control Center
to start the Control Center: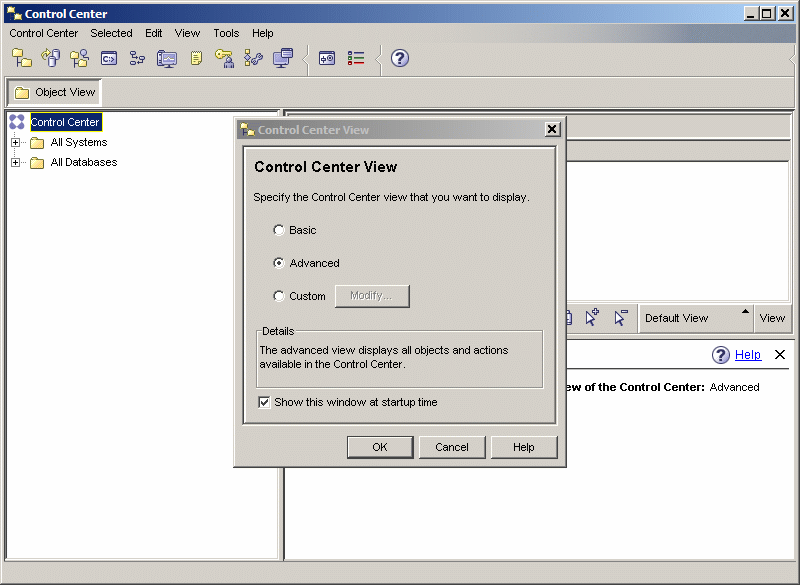
- Click OK to select the default advanced control center view.
- Click the + next to
All Systems.The name of the system on which DB2 the server is running is now visible in the tree. In our example, the system name is JANE2DSY.
- Click the + next to JANE2DSY, and
navigate down the tree to select
Databases: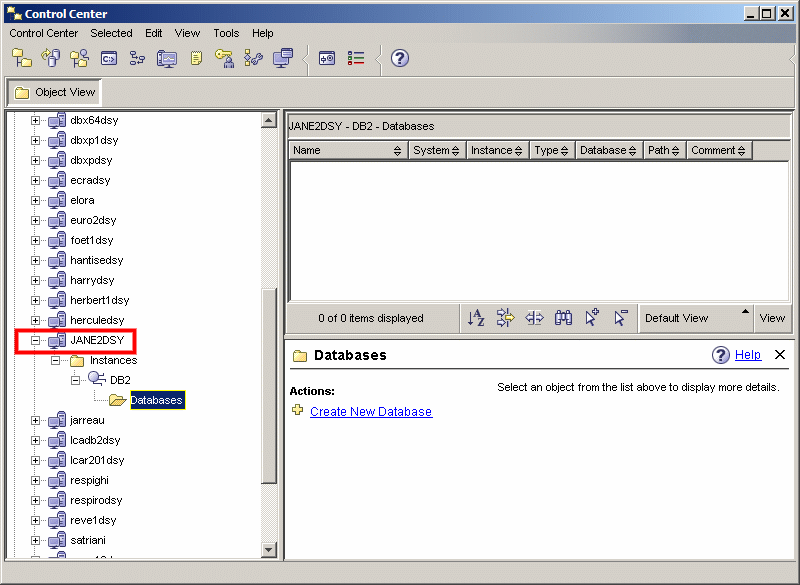
- Click the right mouse button and
select the contextual command
Create Database ->Standard...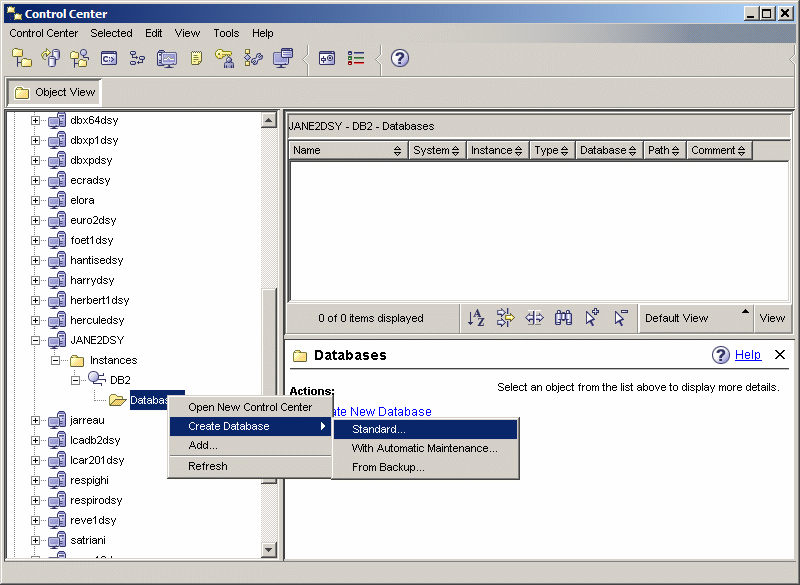
- Using the
Create Database Wizarddialog box, specify the name of the database and alias, and optionally provide a comment: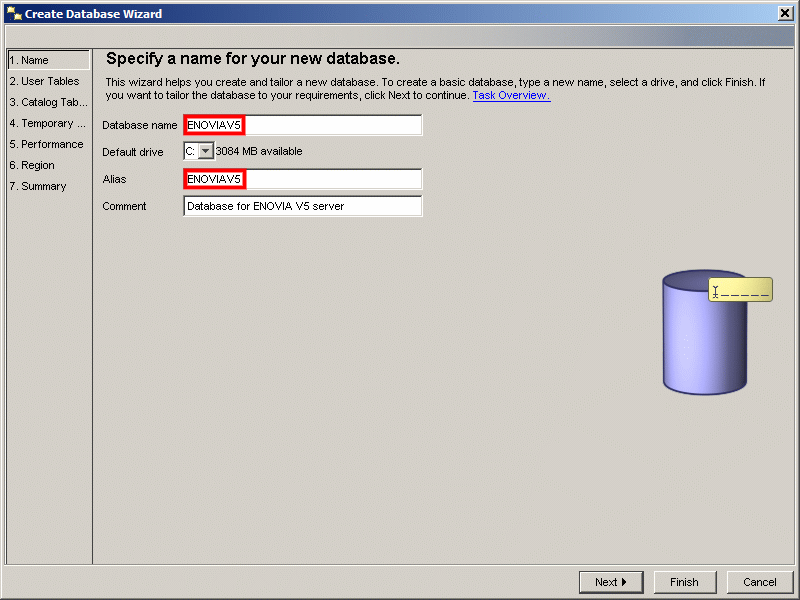
- Select the
Regiontab and check the Identity option for the collating sequence:
- Click the
Finishbutton.You can now step through the remaining dialog boxes and click the
Nextbutton each time to use the defaults. - When you reach the Summary dialog
box, click the
Finishbutton to create the database. - Click the
Nobutton.The Control Center should now display the name of the database:
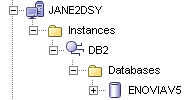
Now that the database has been created, you have to update it appropriately so it can be used by the ENOVIA V5 server. But before being able to do so, you must first connect to the database.
- Select the ENOVIAV5 database in the tree, then right-click and select
the
Connect...command:
The following is displayed:
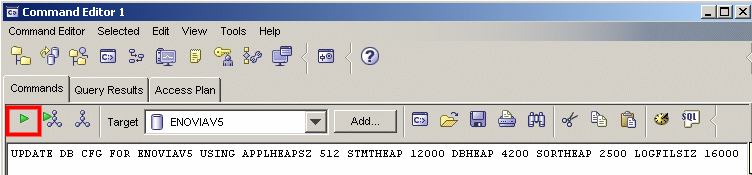
- In the Control Center window,
select
Tools->Command Editorto start the Command Editor. - To select the target database which you want to update, click
the
Add...button: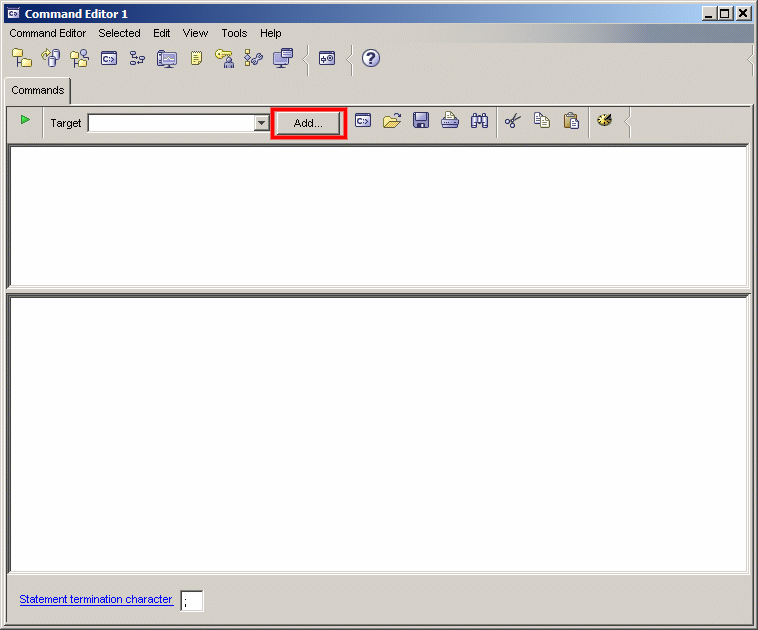
The Specify Target dialog box is displayed.
- Select the name of your database.
In our example, this is ENOVIAV5:
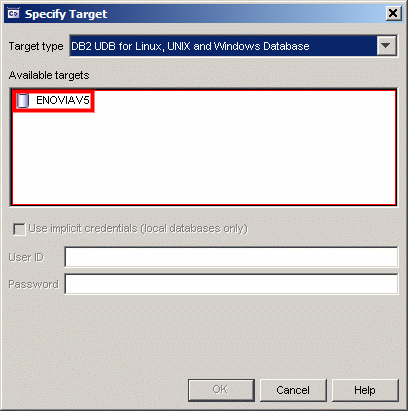
- Click OK.
The Command Editor window now looks like this:
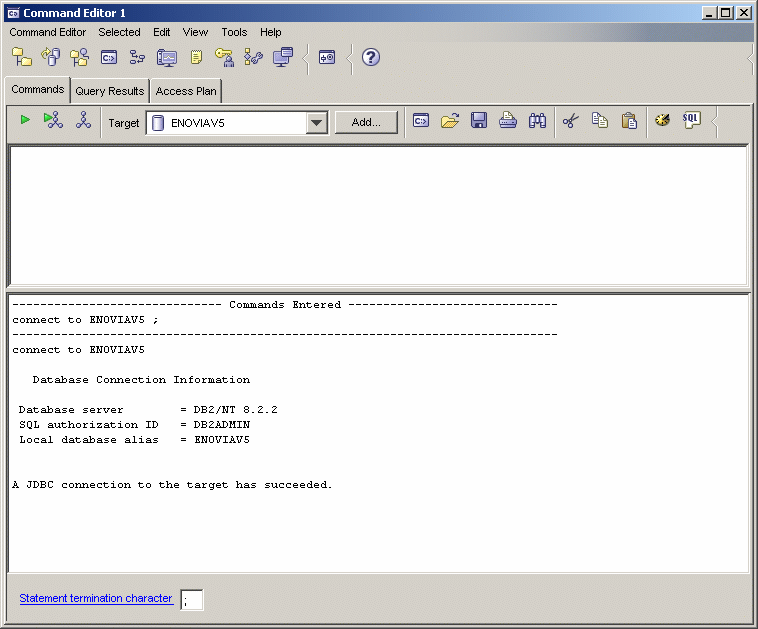
The
Commands Enteredarea specifies that you have successfully connected to the database. - Click in the Commands area (upper
pane) and enter the following command:
UPDATE DB CFG FOR MY_DATABASE USING APPLHEAPSZ
       4096 STMTHEAP 16000 DBHEAP 4200 SORTHEAP
     2500 LOGFILSIZ 16000 LOGSECOND 12 UTIL_HEAP_SZ 10000 CATALOGCACHE_SZ 96
     LOCKLIST 1000 APP_CTL_HEAP_SZ 512 STAT_HEAP_SZ 5022 NUM_IOCLEANERS 2
     MAXAPPLS 200
where
MY_DATABASEis the name of the database created earlier (ENOVIAV5 in our example).Note about the LOGFILSIZ Parameter
If you use the database configuration parameters documented above, during an ENOVIA V5 VPM installation, the ENOVIA database will be set up correctly, and the default security mask will be imported. However, if you neglect to set the LOGFILESIZ parameter correctly, the default security mask import step may fail.
If a problem with the default mask is detected, the following error message:
Although commit succeeded, mask was not created - Check Database
     configuration
means that the mask was not created, but no error occurred during the commit phase. It may be because the database was not created using the LOGFILSIZ parameter. In this case, update the database configuration using the correct LOGFILSIZ parameter value and reimport the mask using the command VPMPeopleUpdate -m as explained in "People, Organization and Security Tools" in your Enterprise Architecture Administration Guide.
- Press the Execute arrow in the top
left corner of the window to update the database:
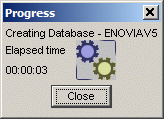
The command connects to the database then updates it with the appropriate parameters.
Once the database has been updated, the message area at the bottom of the window confirms that the command completed successfully:

You are now ready to install the ENOVIA V5 VPM server software.
A progress dialog box informs you that the database is being created:
You can ignore any prompt which may appear prompting you to catalog the database once created.
A message informs you that the database has been successfully created, and prompts you to run the Configuration Advisor to tune the database:

DB2 Performance Considerations
ENOVIA V5 VPM has been developed to work optimally with DB2. However to take full advantage of the hardware available, a minimum amount of configuration may be necessary.
The most important considerations consist in allocating enough BUFFERPOOL space, and in updating the database statistics by running the db2 RUNSTATS command.
Note: each ENOVIA V5 VPM installation may be unique due to a specific hardware configuration and system load (and there is no universal configuration that will be optimal). However, it is recommended to start with a simple configuration and tune it over time, using the input provided by the System Monitor tool.
Refer to the DB2 System Monitor Guide and Reference for information on monitoring the performance of a DB2 database.
- Bufferpool sizing
This parameter is often the single most important factor affecting performance. A bufferpool is a cache used for reading/writing database pages during SQL operations. In the ideal situation, the bufferpools will be large enough so that all the data read by ENOVIA V5 VPM stays resident in memory, therefore eliminating most I/O. To determine if your bufferpool(s) is/are performing well, you can use the following monitor commands:
db2 update monitor switches using bufferpool on # ask DB2 to #
       monitor bufferpool activity

       ... run ENOVIA V5 VPM for a while, under high load ...

       db2 get snapshot for bufferpools on VPMDB
If the ratio between the number of data and index LOGICAL reads, and the number of data and index PHYSICAL read is very large, then a bufferpool is performing well and is large enough.
A logical read is a request for reading a page, a physical read is reading this page from disk. Once all required pages have been read in the bufferpool, no more physical reads are required. You should allocate as much space as necessary or, if possible, to the bufferpool(s). You may want to allocate as much as half the available memory to the bufferpool(s).
To change the size of a bufferpool:
db2 connect to VPMDB

       db2 alter bufferpool IBMDEFAULTBP size 10000 # 40 Megabytes

       db2 alter bufferpool VPM_BP1 size 125000 # 1 Gygabyte (8K pages)
- Update the database statistics
ENOVIA V5 VPM issues dynamic SQL to the DB2 server. This type of SQL is compiled at run-time by the DBMS. The DB2 SQL optimizer will choose what it considers to be the optimal Access Plan based on the statistics existing on the database. It is very important for these statistics to be updated after the database has grown, because an access plan that is optimal with a table that contains for example 100 rows, may become catastrophic from a performance point-of-view for a table that contains 100000 rows.
You should update the statistics every time the ENOVIA V5 VPM data have been considerably modified, such as after importing data into the database.
db2 reorgchk update statistics on table all
- Other configuration parameters improving performance
The following parameters are recommended as they may contribute to improve the performance of an ENOVIA V5 VPM installation:
Database registry
db2set DB2_HASH_JOIN=ON
db2stop;
db2start;
Note: to avoid errors occurring when saving parts, we recommend that you increase DB2 database APP_CTL_HEAP_SZ. The default is 128. Increase it to 256 to avoid the problem.
![]()