 |
This task shows you how to repeat
components as many times as you wish in the direction of your choice. |
| |
The
option "Automatic switch to Design mode" is now available for this command.
For more about this option, refer to
Access to
geometry. |
 |
Open the
Multi_Instantiation.CATProduct document. |
 |
1. |
Select
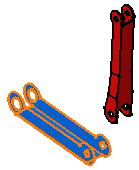
the component you wish to instantiate, that is CRIC_BRANCH_3. |
|
|
 |
|
2. |
Click the
Define Multi-Instantiation icon:

The Multi-Instantiation dialog box
is displayed, indicating the name of the component to be instantiated. |
 |
|
The
Ctrl + E
shortcut calls the command too. |
|
|
 |
|
3. |
The
Parameters option lets you choose between the following categories of
parameters to define:
|
Instances & Spacing |
|
Instances & Length |
|
Spacing & Length |
Keep the Instances & Spacing parameters option and enter 3 as the
number of New Instances and 90mm as the value for the spacing between each
component. |
|
4. |
To define the direction of creation, check x axis.
There is another way of defining a direction. You can
select a line, axis or edge in the geometry. In this case, the coordinates
of these elements appear in the Result field.
Clicking the Reverse button reverses the direction. |
|
|
The application previews the location of the new
components: |
|
|
 |
|
5. |
Make sure
the option Define as Default is on. If it is so, the parameters you have
just defined are saved and can be reused by the
Fast Multi-Instantiation command. |
|
6. |
Click OK
to create the components. Three additional components are created in the
x direction. The tree displays them as well. |
|
|
 |
 |
|
The Apply
button executes the command but the dialog box remains open so as to let
you repeat the operation as may times as you wish. |


