These features make the creation process easier.
- cutouts
- holes
- beads
- flanges
- flanged holes
- stamps (except stiffening ribs)
- Aerospace Sheetmetal Design patterns
These features must lie on a unique and planar surface.
-
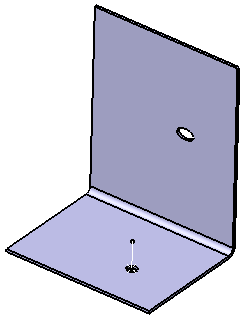
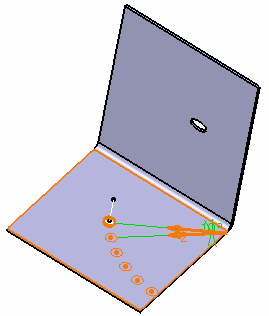
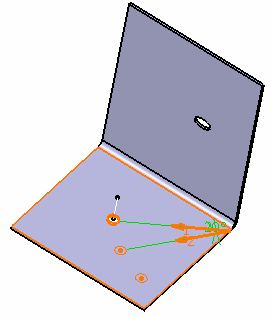
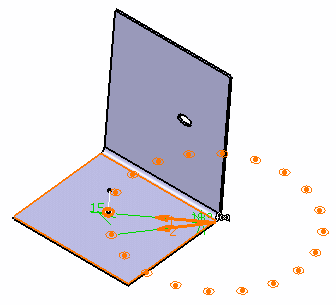
Select the circular cutout you want to duplicate.
-
Click Circular Pattern
 .
.The Circular Pattern Definition dialog box is displayed. -
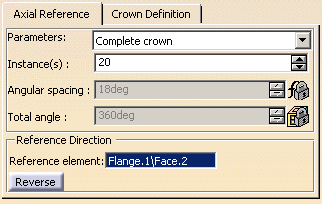
Define the Axial Reference by choosing the Parameters type, and reference direction.
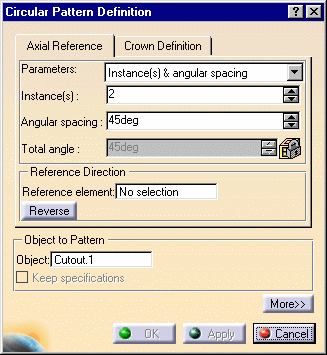
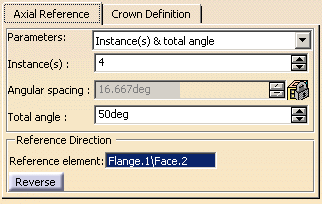
- Instance(s) & total angle: the number of patterns as
specified in the instances field are created, in the specified
direction, and evenly spread out over the total angle.
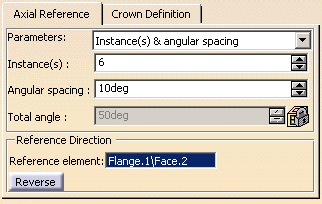
- Instance(s) & angular spacing: the number of
patterns as specified in the instances field are created in the
specified direction, each separated from the previous/next one of
the angular angle value.
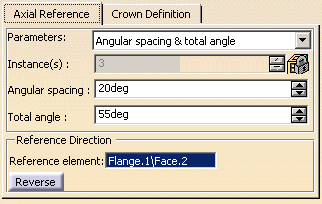
- Angular spacing & total angle: as many patterns as
possible are created over the total angle, each separated from the
previous/next one of the angular angle value.
- Complete crown: the number of patterns as specified
in the instances field are created over the complete circle
(360deg).

If you set Instance(s) & total angle or Angular spacing & total angle parameters, note that you cannot define the length by using formulas. - Instance(s) & total angle: the number of patterns as
specified in the instances field are created, in the specified
direction, and evenly spread out over the total angle.
-
Click the Reference element and select the element defining the rotation axis.
Here select the face on which lies the circular cutout. 
- To define a direction, you can select an edge or a planar face.
Should you select the face of a web, the rotation axis would be normal to that face. - Click the Reverse button to inverse the rotation direction.
- To define a direction, you can select an edge or a planar face.
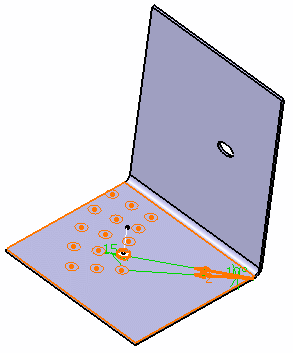
Now you are going to add a crown to this pattern.
This figure may help you define these parameters:
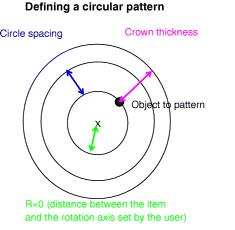
- Circle(s) and crown thickness: you define the number of circles and they are spaced out evenly over the specified crown thickness
- Circle(s) and circle spacing: you define the number of circles and the distance between each circle, the crown thickness being computed automatically
- Circle(s) spacing and crown thickness: you define the distance between each circle and the crown thickness, and the number of circles is automatically computed.
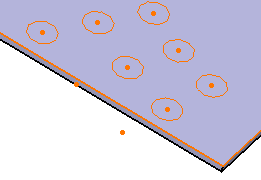
For example, using the values described above for the Angular spacing & total angle option, you could define the crown as:

-
Click the More>> button to display further options:
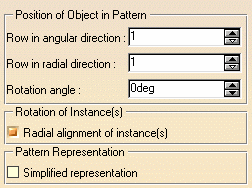
Using these options, you can change the position of the selected cutout within the crown. For example, if you set the Row in angular direction parameter to 4, this is what you obtain: the initially selected cutout is the fourth instance, based on the rotation direction, of the pattern.
Typically, in this case, you might want to edit the pattern and click again the instance that you removed above, to get a full pattern.
|
|
|
-
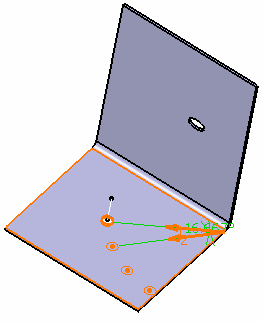
Click OK to create the pattern.
")
- When you duplicate a pattern of flange, the edge of the flange spine and its instances have to be tangent to the wall edge: you cannot choose a direction of patterning not parallel to the flange spine.
- All instances of the flange pattern must lie on the same face as the flange pattern.
![]()