|
|
This task shows you how to insert a Roughing
operation into the program. This operation rough machines parts by
horizontal planes, so you must define:
|
|
|
|
Make the Manufacturing Program the current entity in the tree. | |
|
|
1. | Select the Roughing icon
A Roughing entity and a default tool are added to the program. The dialog box opens at the Geometry tab page
This page includes a sensitive icon to help you specify the geometry to be machined. |
| 2. | Click the red Part area in the sensitive
icon and select the part body in the viewer. Double click anywhere in the viewer to confirm your selection and display the dialog box again. |
|
| 3. | Click the Rough stock area in the sensitive
icon and select the stock in the viewer. Please note that you may need to use the Hide/Show command to make the Stock visible. Double click anywhere in the viewer to confirm your selection and display the dialog box again.
|
|
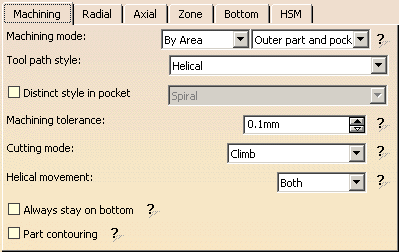
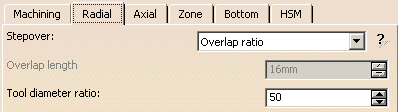
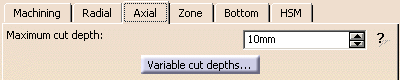
| 4. | Select the Strategy
tab page
|
|
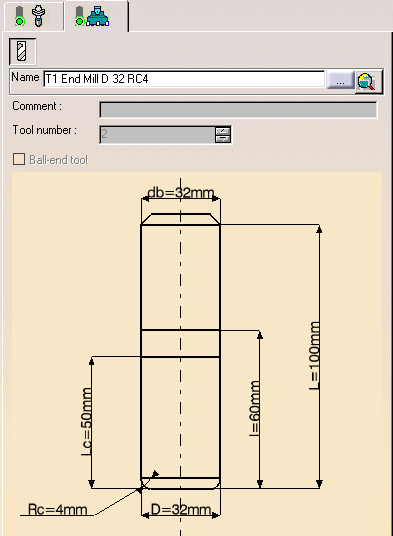
| 5. | Select the Tool
tab page |
|
| 6. | Enter a name of the new tool (for
example, T1 End Mill D 32 RC4).
|
|
| 7. | Double click the D (nominal diameter)
parameter in the icon, then enter 32mm in the Edit Parameter dialog box. The tool icon is updated to take the new value into account. Set the db (body diameter) parameter to 32mm in the same way. |
|
| 8. | If needed, deselect the Ball-end tool
checkbox.
Double click the Rc (corner radius) parameter in the icon, then enter 4mm in the Edit Parameter dialog box. |
|
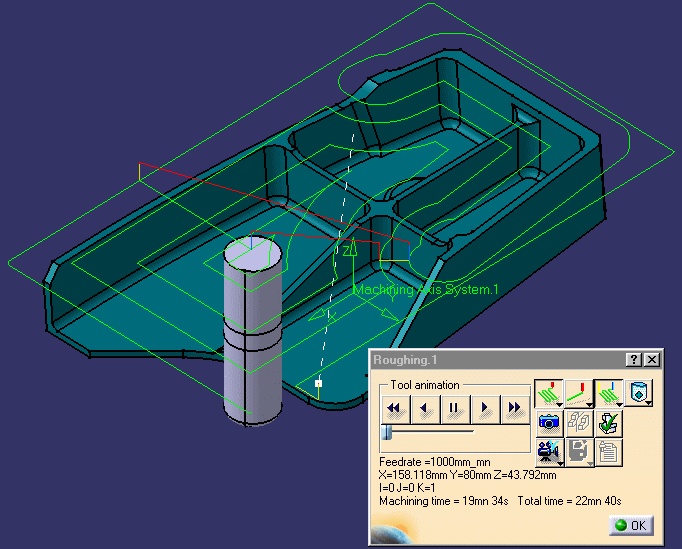
| 9. |
Click Replay to compute the operation and visualize the tool path. You will see that the part has been rough machined.
|
|
| 10. | Click OK to create the operation. | |
|
|
||